dollar-store-fall-centerpiece-makeover-hip2save-com.jpg

Make Spray Painted Pumpkins as a DIY Halloween Decor Project

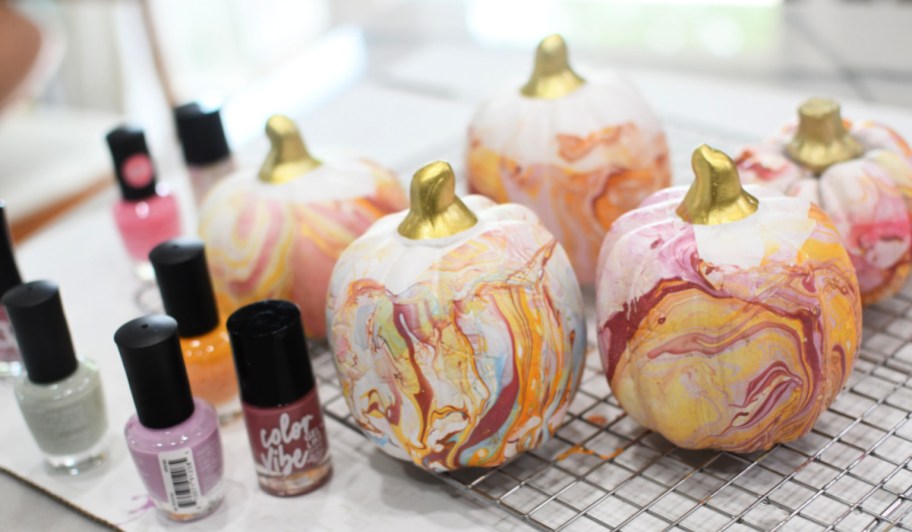
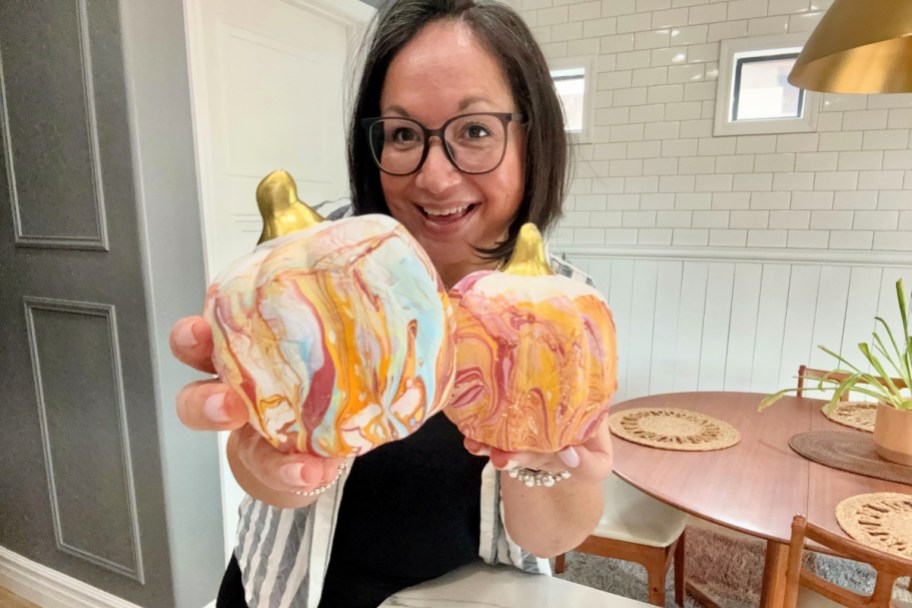
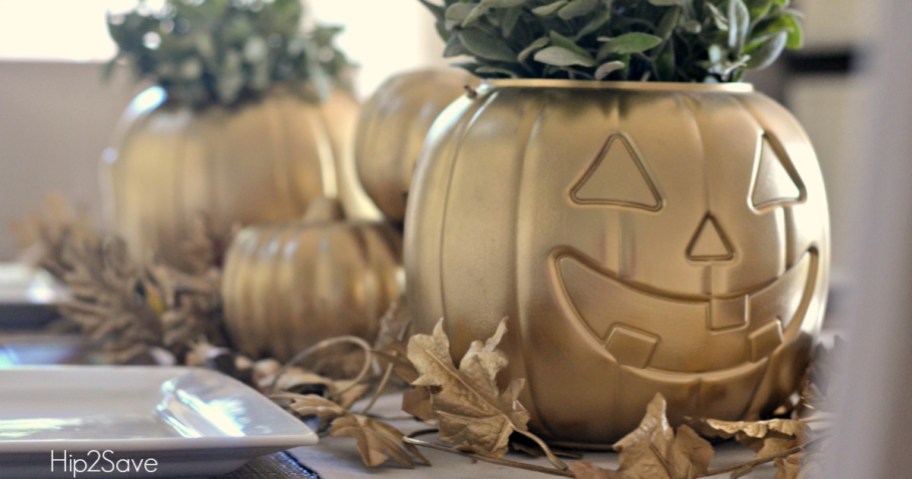
Gourds go glam with this DIY Halloween decor flip with spray painted pumpkins from the Dollar Tree!

table centerpiece with plastic pumpkins spray painted in gold

Excited for fall decorating? Try this easy pumpkin centerpiece Dollar Tree DIY! 🎃

I absolutely love decorating for all the different seasons, but it doesn’t always make sense to spend a ton of money on seasonal decor since I only use it for a couple of months out of the year.

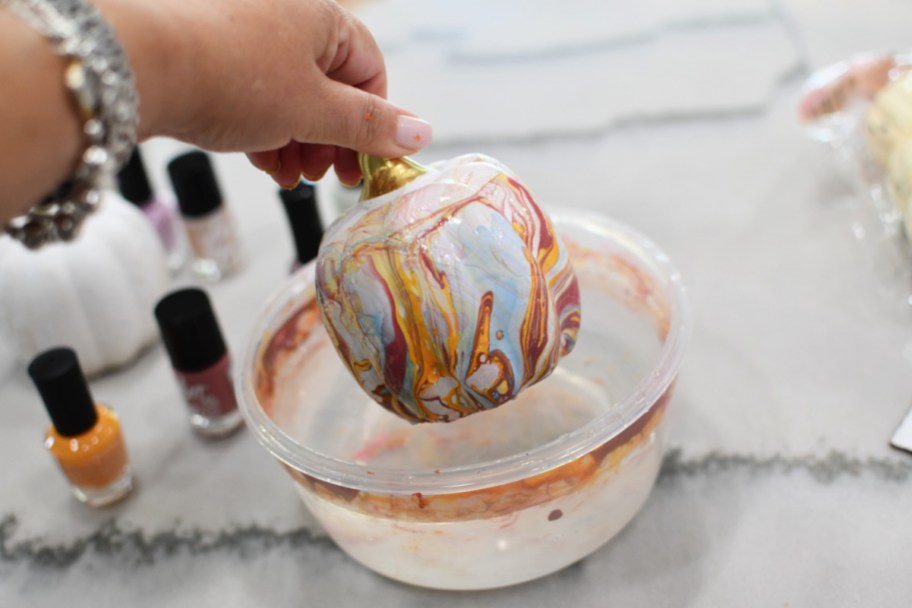
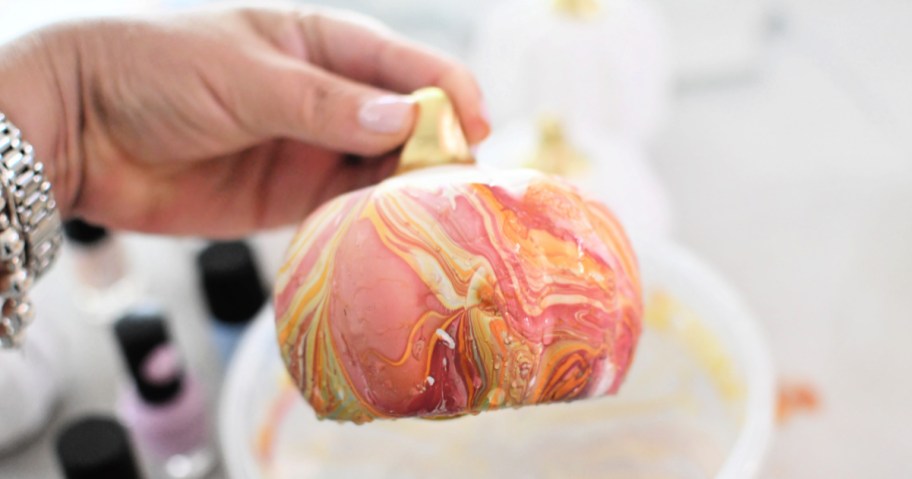
If you feel the same, let’s grab some spray paint and transform a few inexpensive Dollar Tree plastic pumpkins into a chic DIY pumpkin centerpiece for your fall table! Painting pumpkins with spray paint is a really fun DIY Halloween decor project that will give those Dollar Tree pumpkins a shimmery makeover without breaking the bank!

dollar tree basket of diy halloween decor

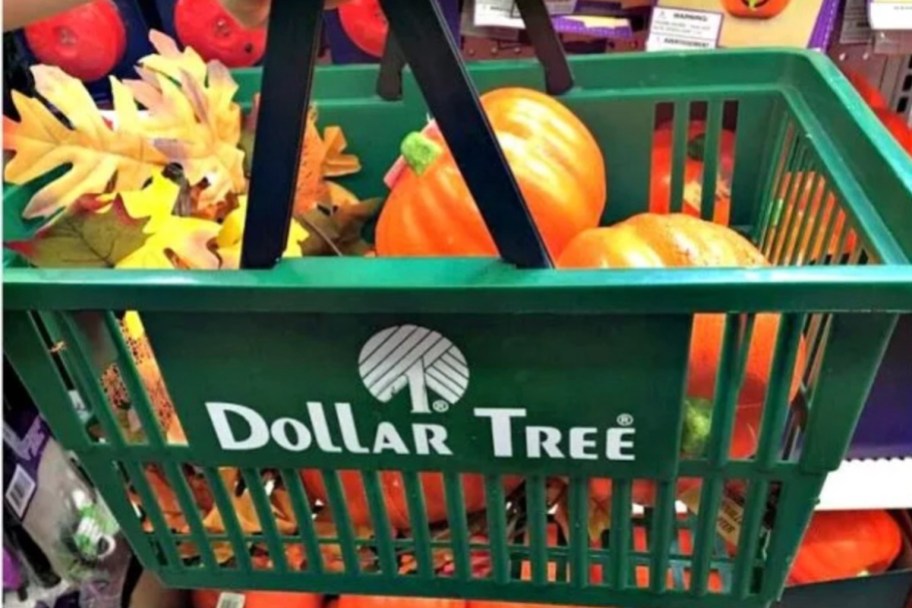
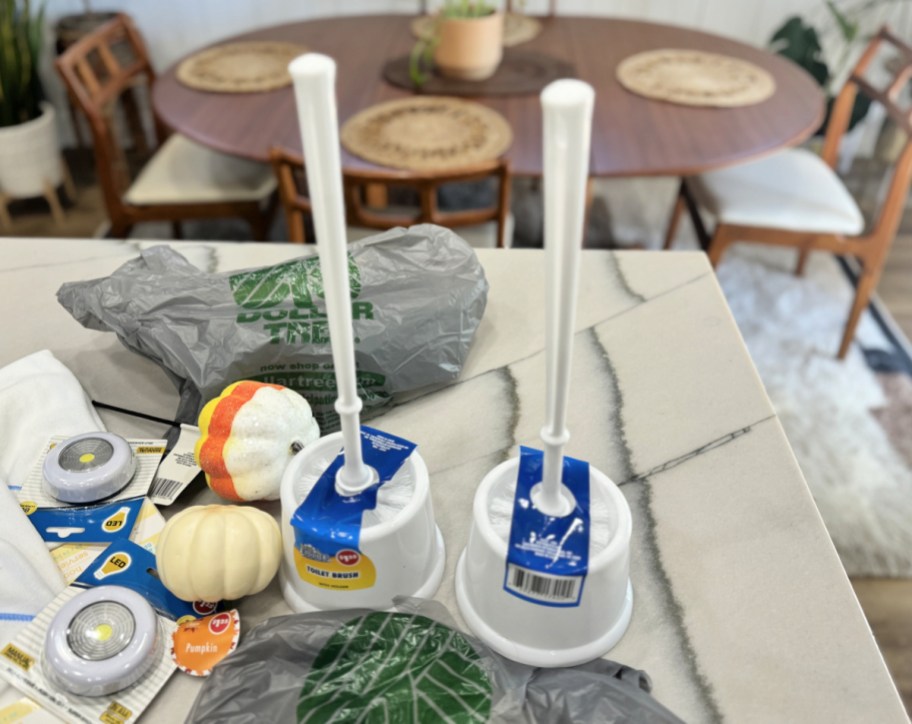
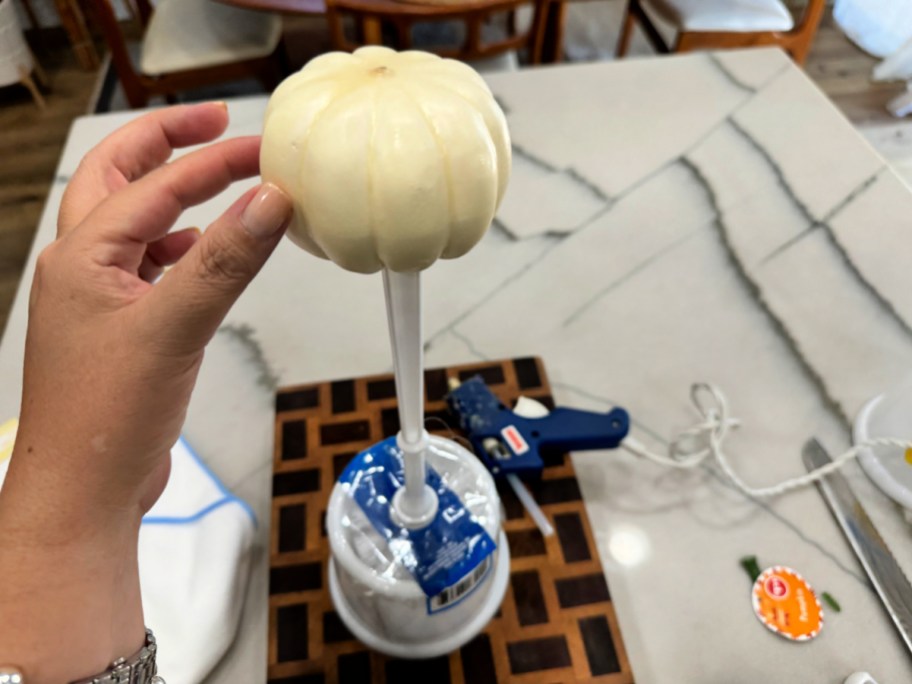
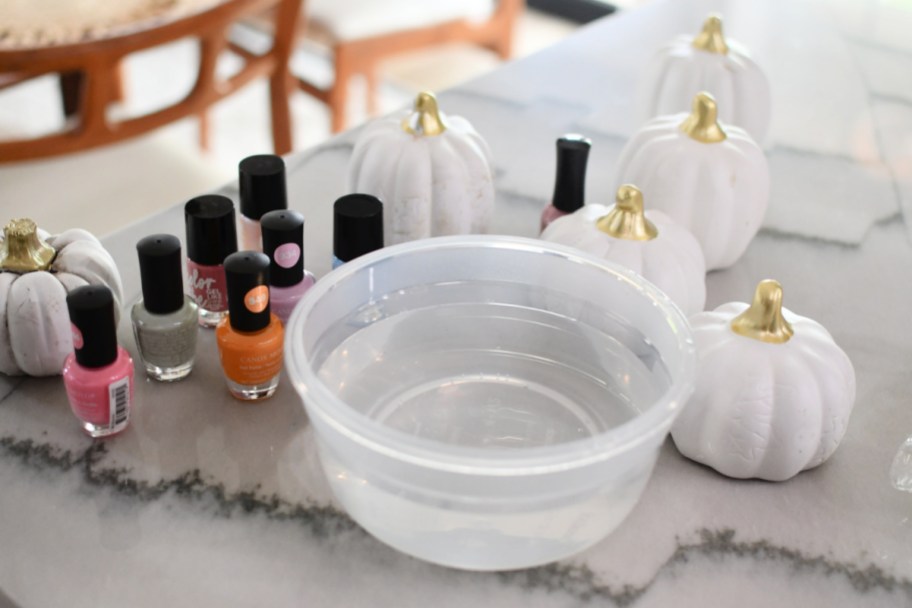
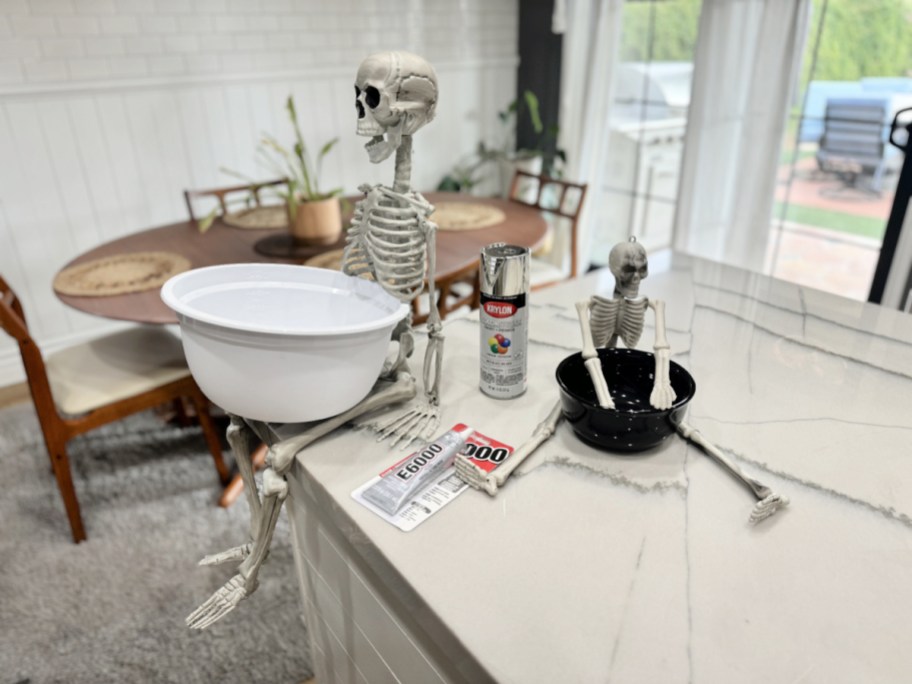
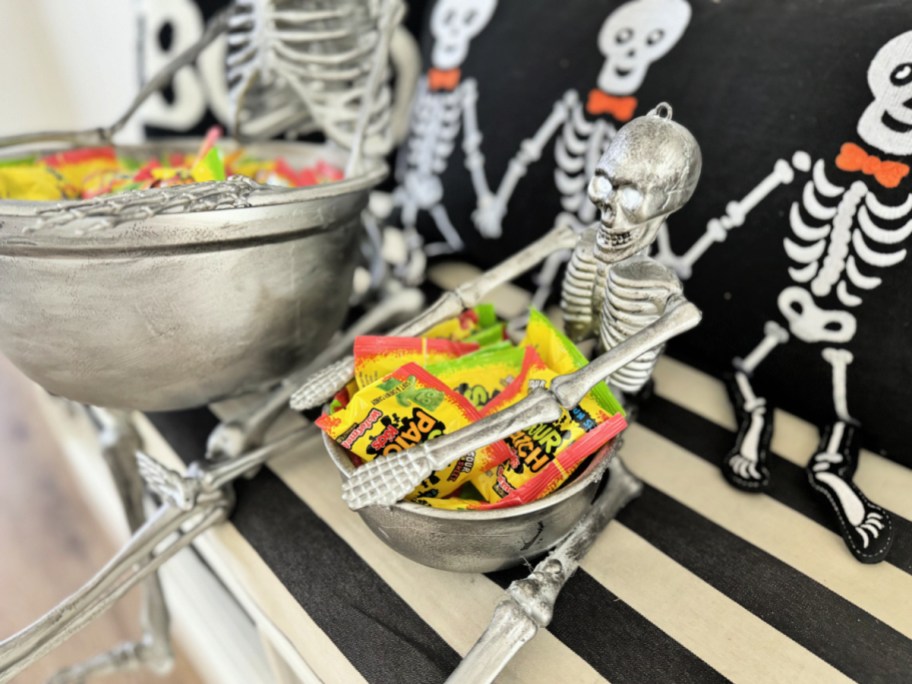
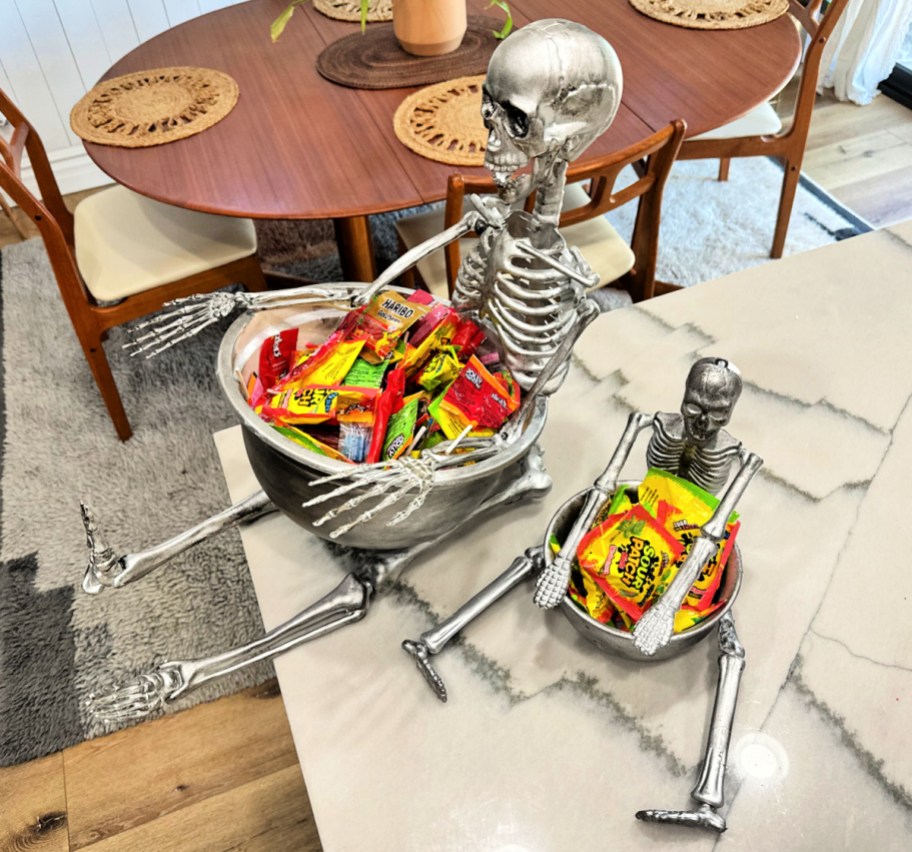
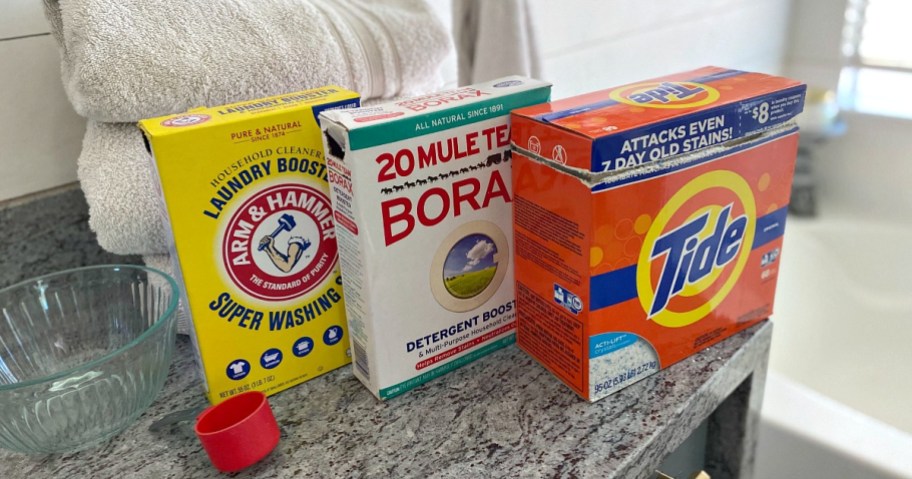
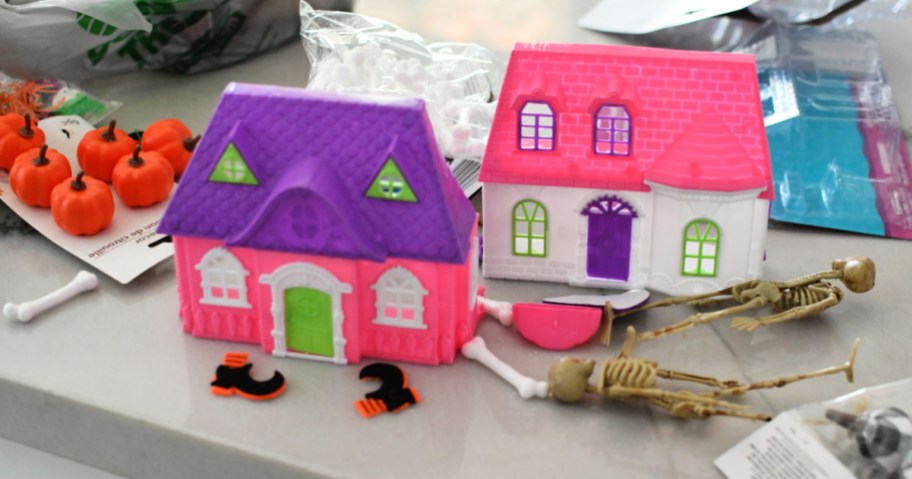
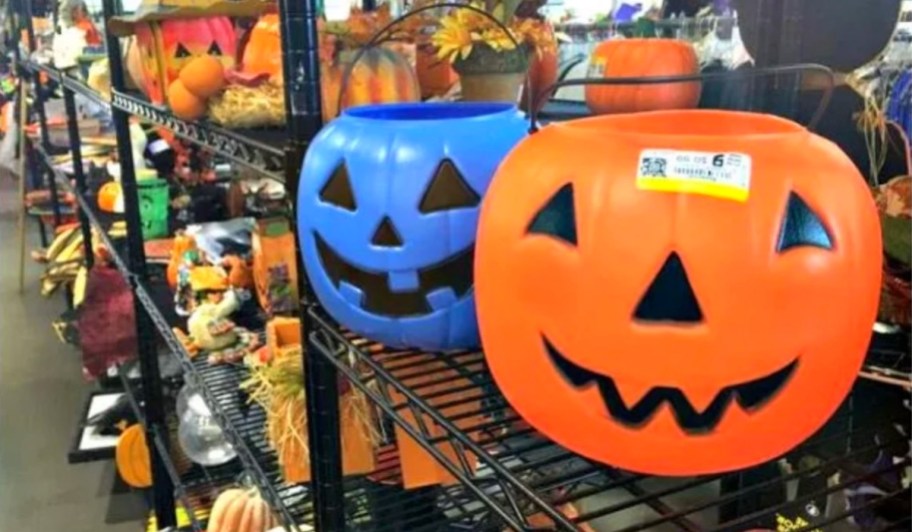
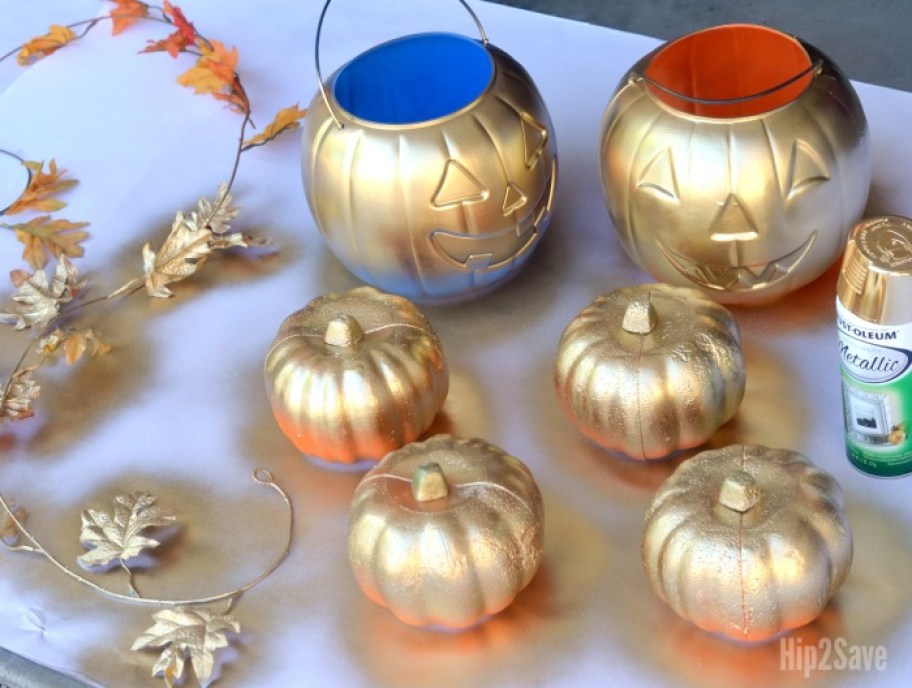
To get started, I picked up some pumpkins and leaf garlands from Dollar Tree. I also grabbed two of those pumpkin candy pails from the thrift store for just 69¢ each (you can also buy the pumpkins and the leaf garlands on Amazon). You could also check out the assortment of pails at Dollar Tree too! My strategy was to spray paint all of the items the same color for a more uniform and stylish look – and I’m LOVING the results!

WARNING: Spray painting pumpkins is FUN and gets addicting, especially with this DIY Halloween decor project!

pumpkin baskets dollar tree

pumpkins with spray paint

diy spray-painted pumpkins

diy halloween decor spray painted gold pumpkins on table


Spray Painted Pumpkins Centerpiece


Print

Supplies Needed

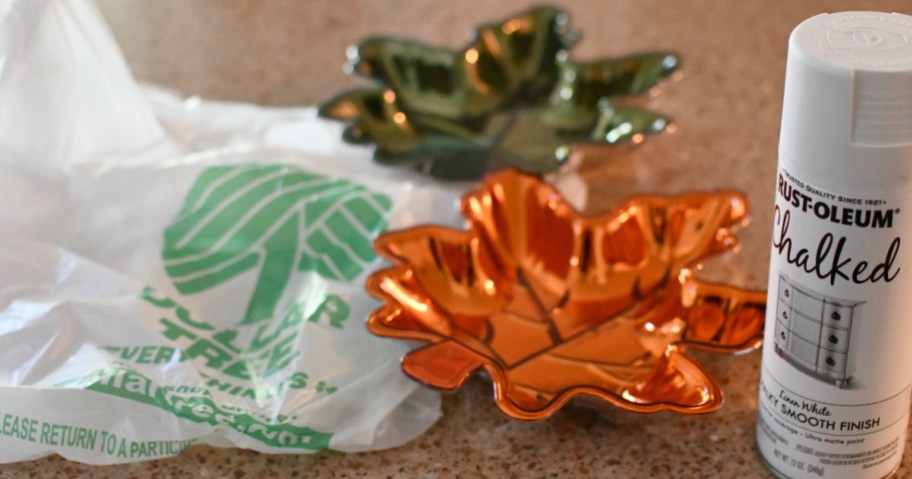
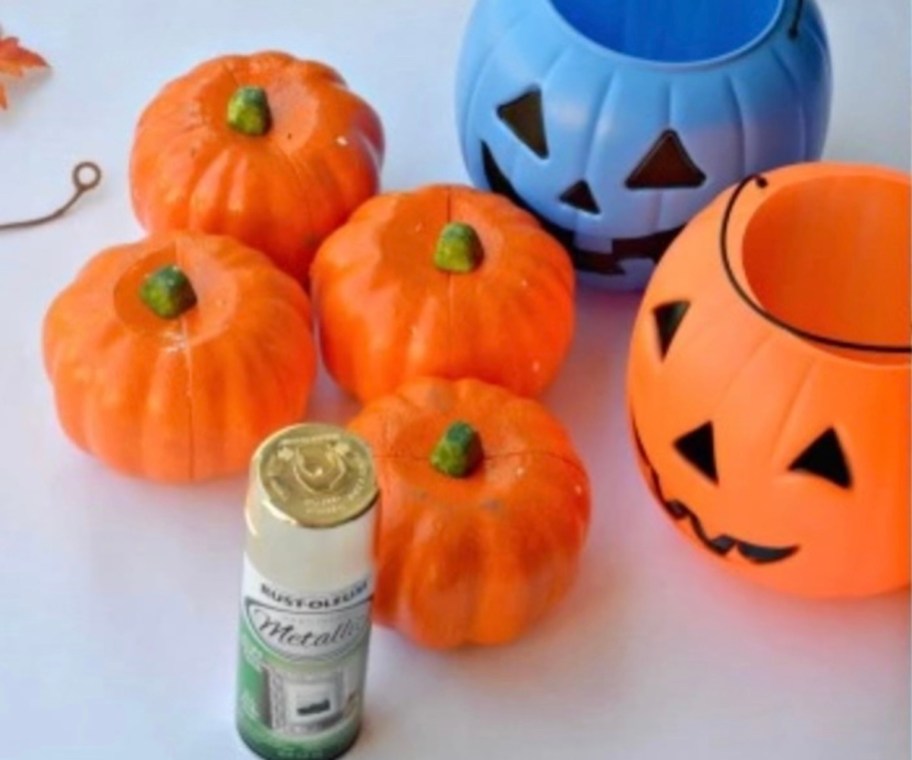
  • Any fall items from the Dollar Tree or thrift stores (plastic pumpkins and garland shown)

  • Metallic spray paint

Directions

1

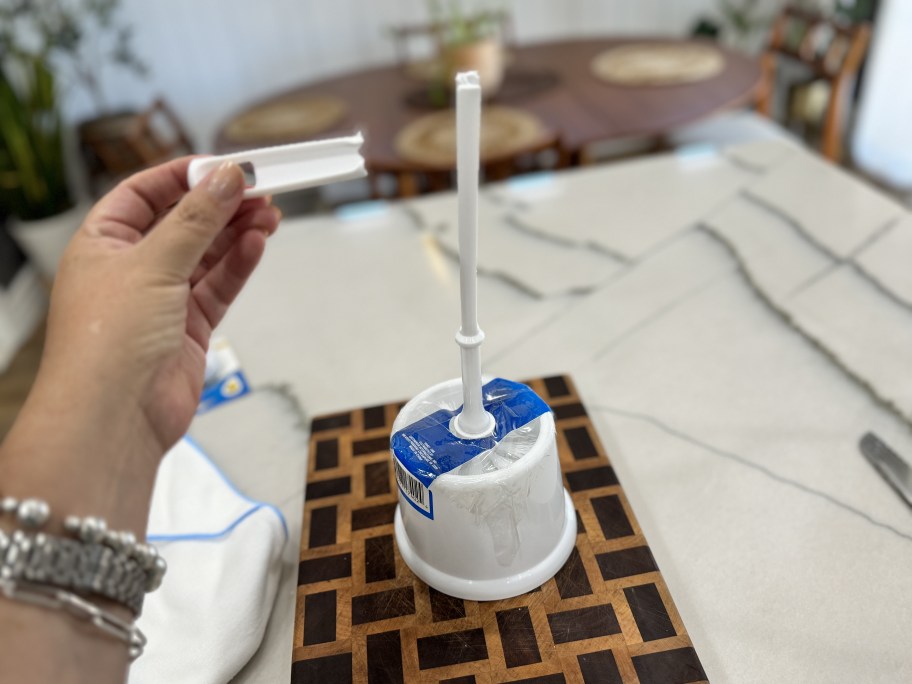
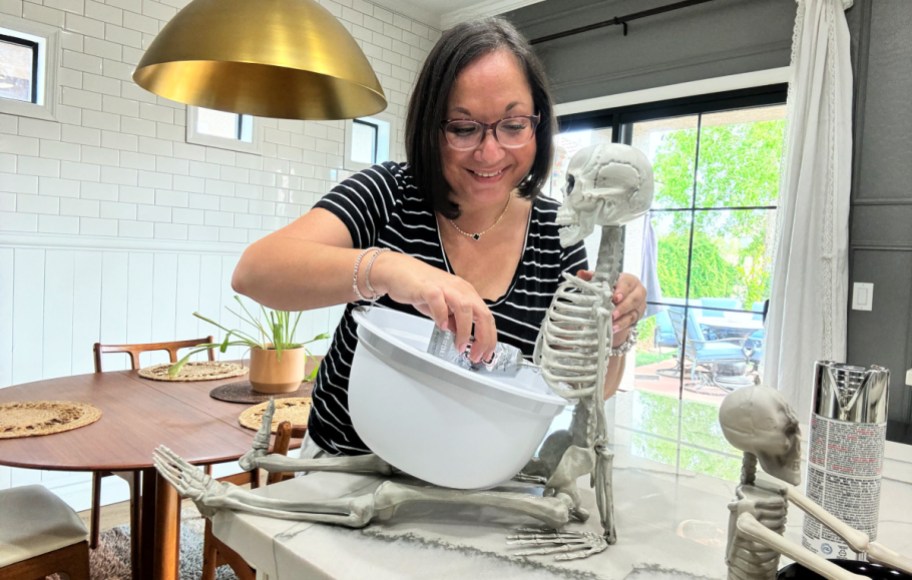
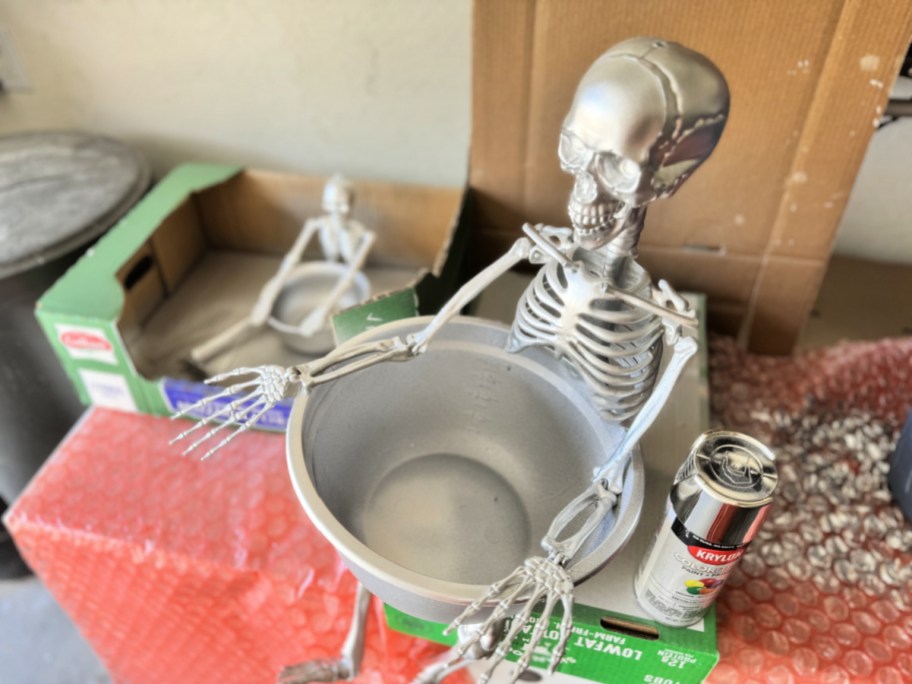
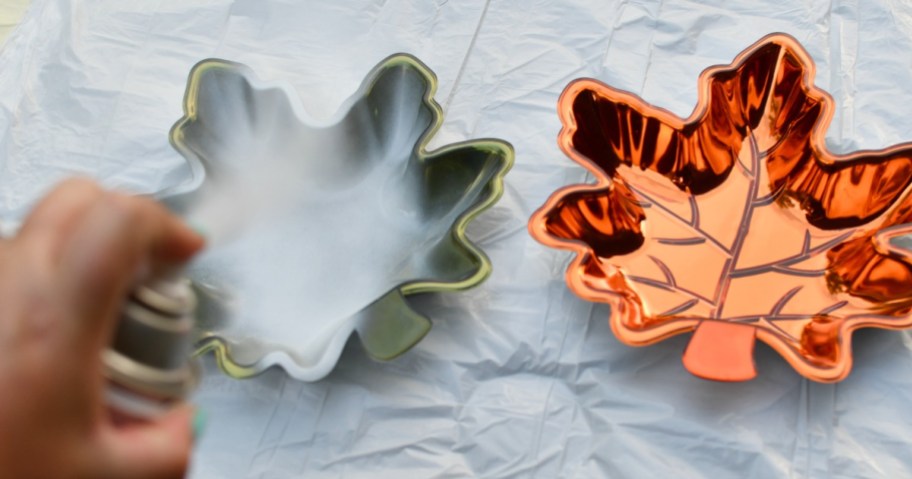
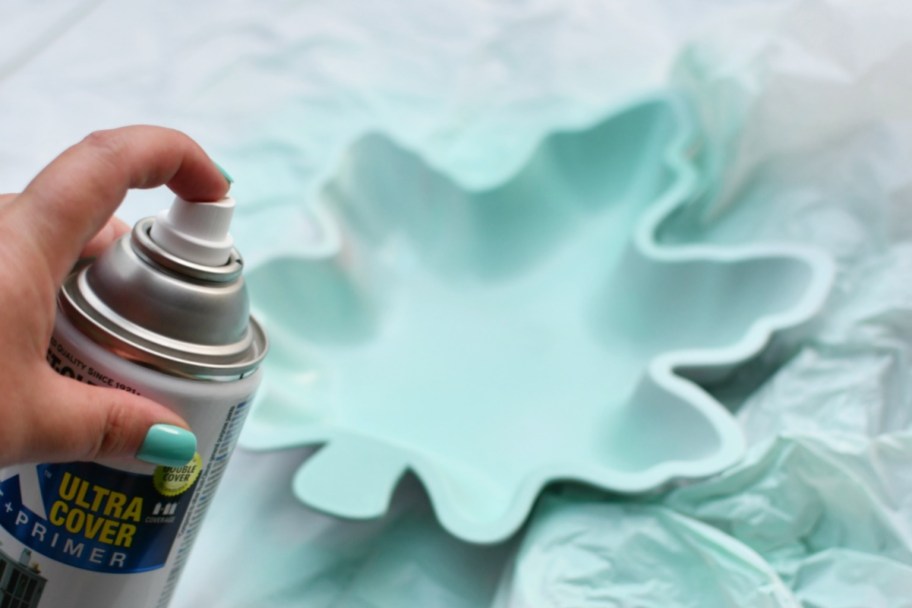
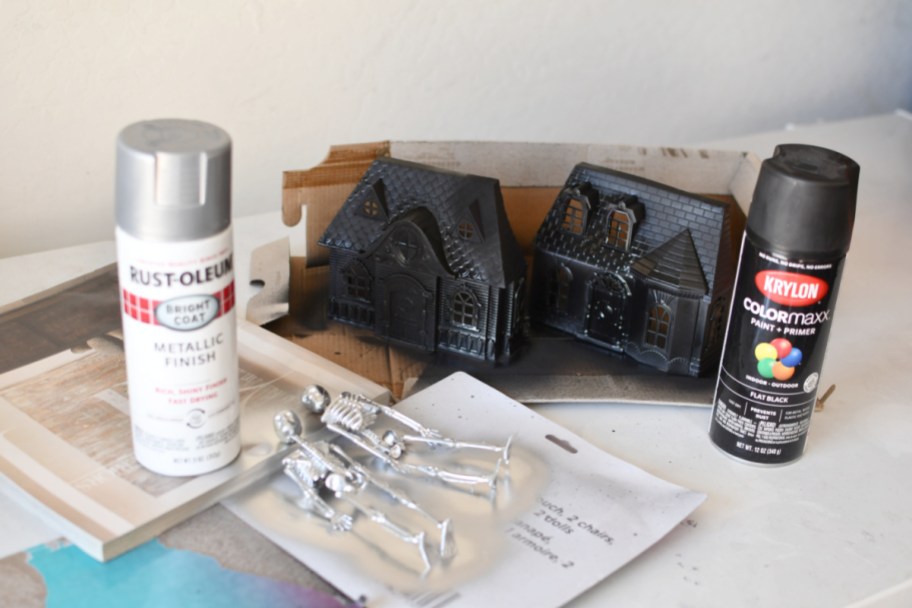
Protect a well-ventilated area with paper, a drop cloth, or some type of covering you don’t mind getting paint on.

2

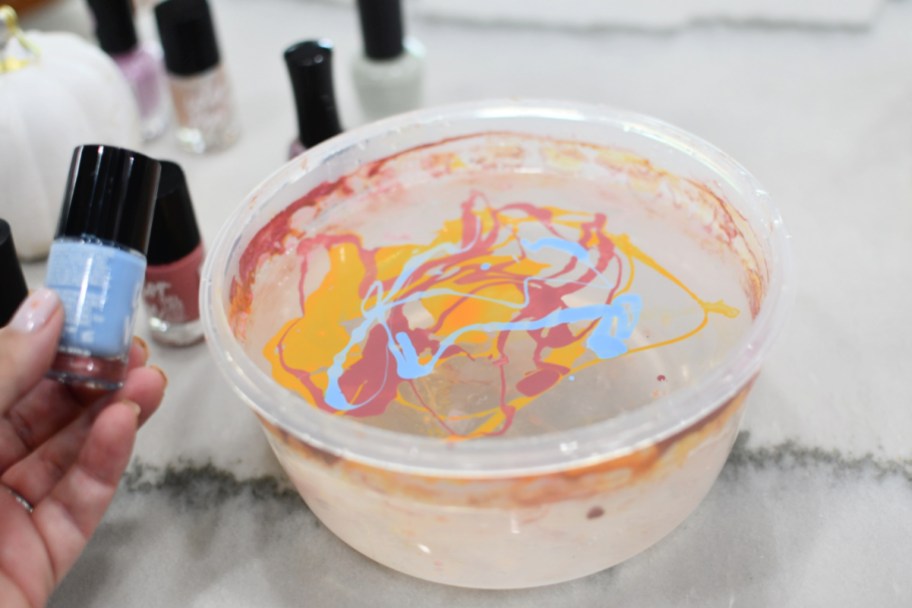
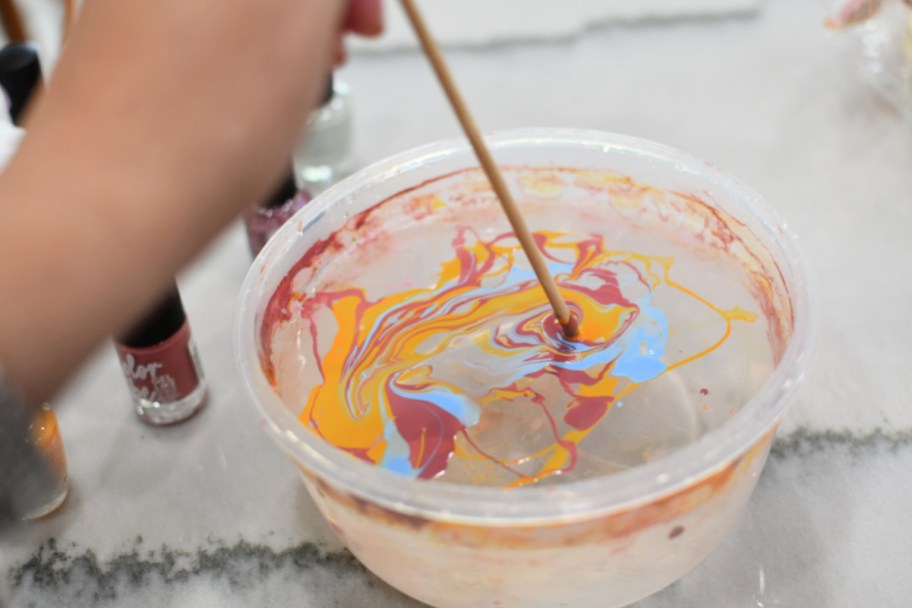
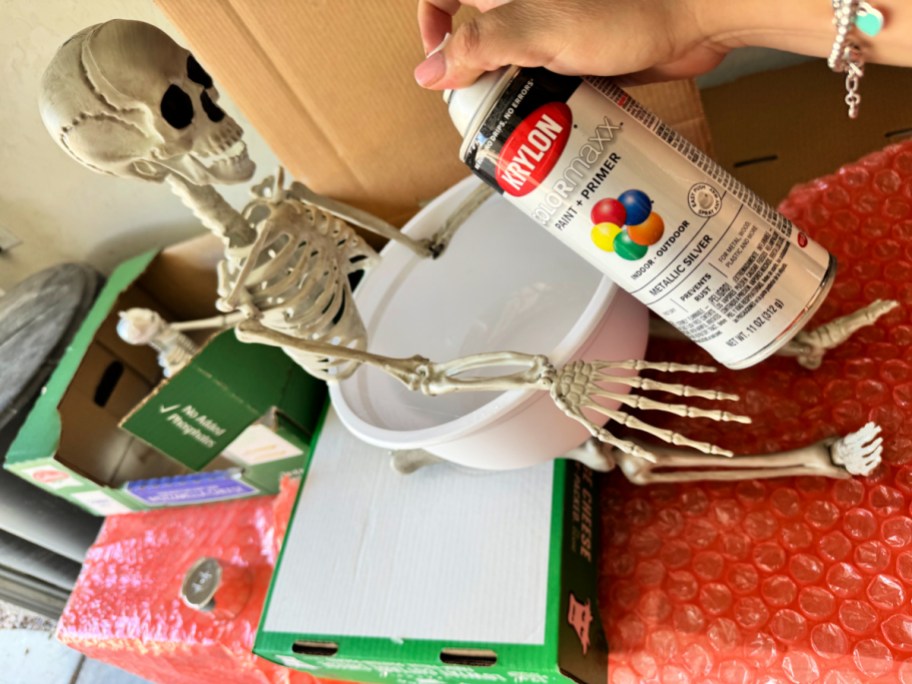
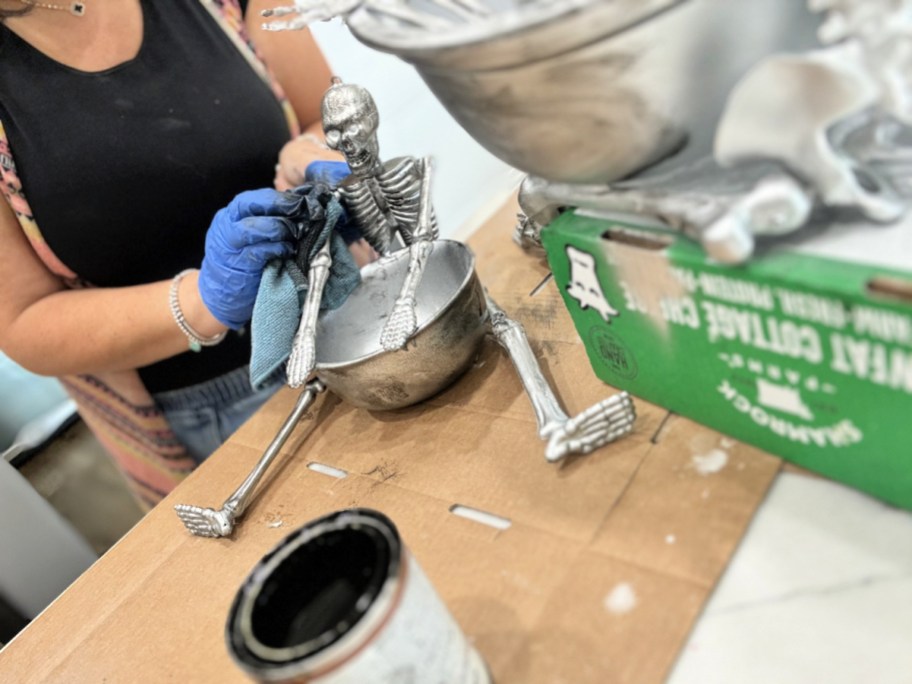
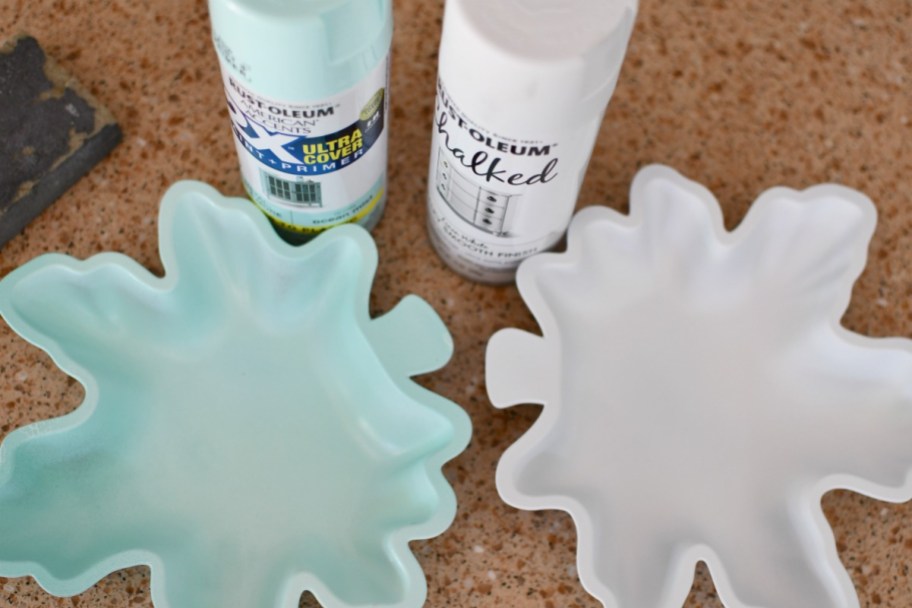
Spray paint pumpkins and garlands with the desired paint color. To avoid runny paint, make sure you’re not spraying too close to the object, and take your time to do a few thinner coats of paint, allowing it to dry in between each one.

3

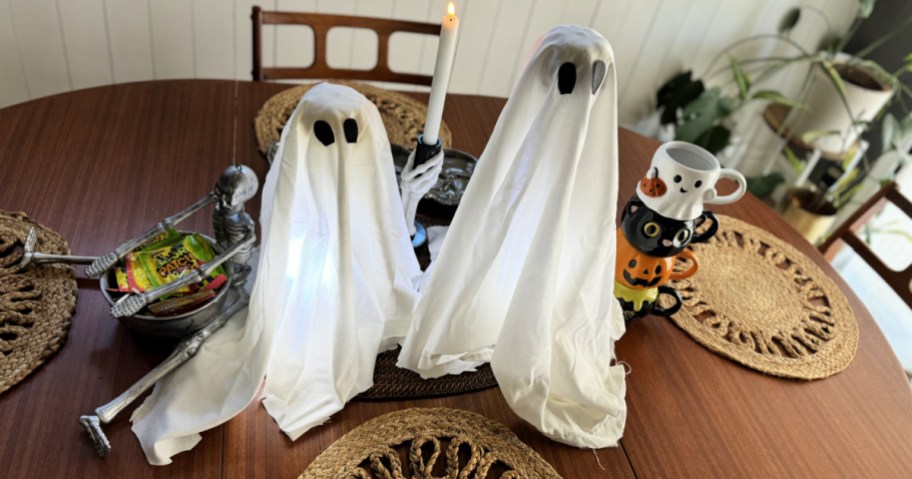
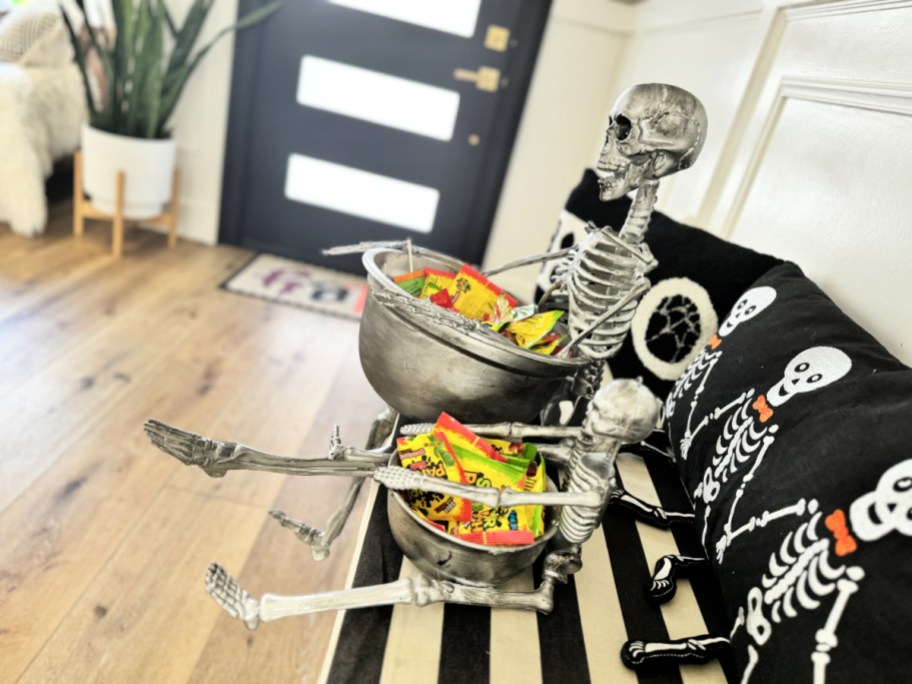
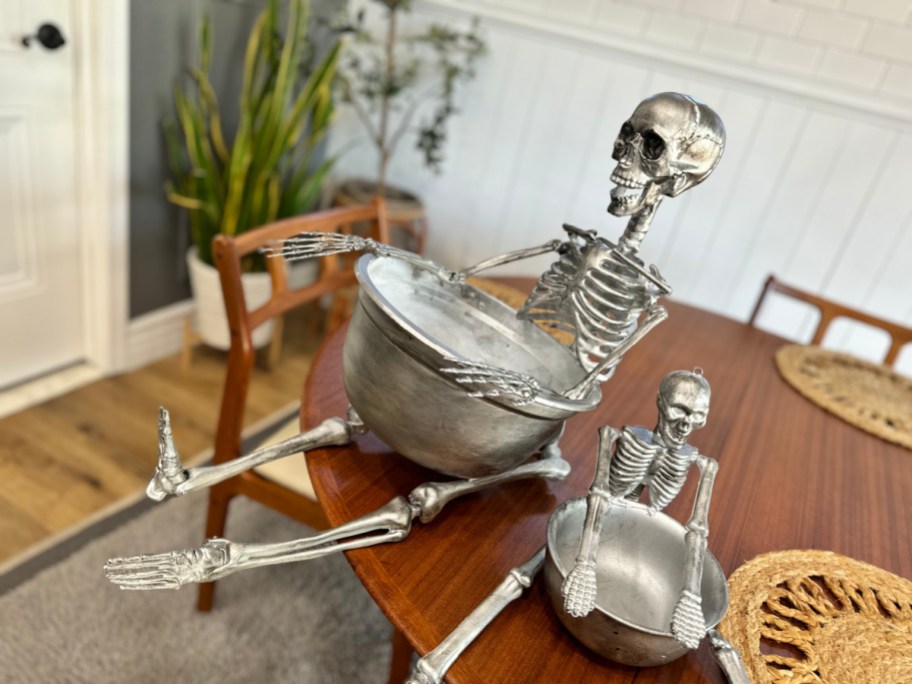
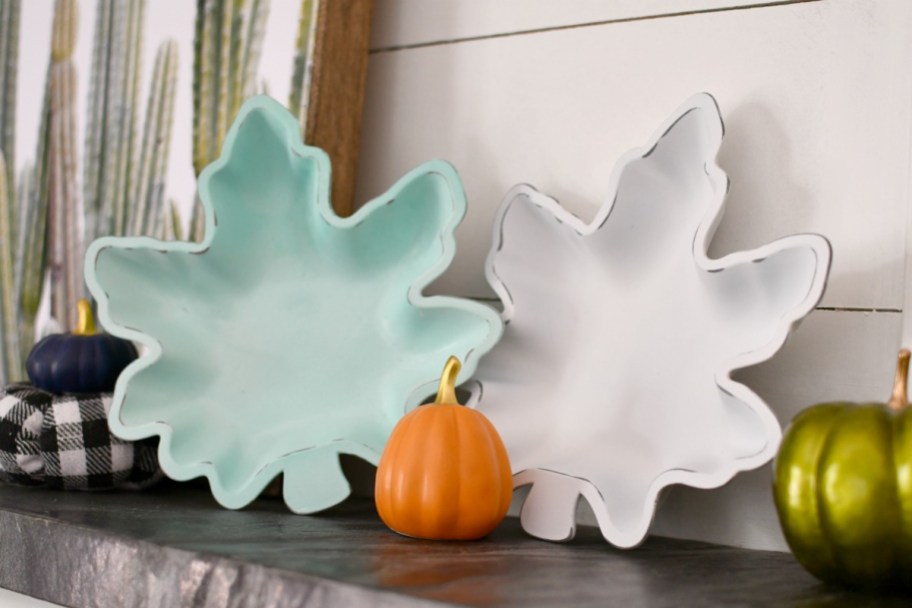
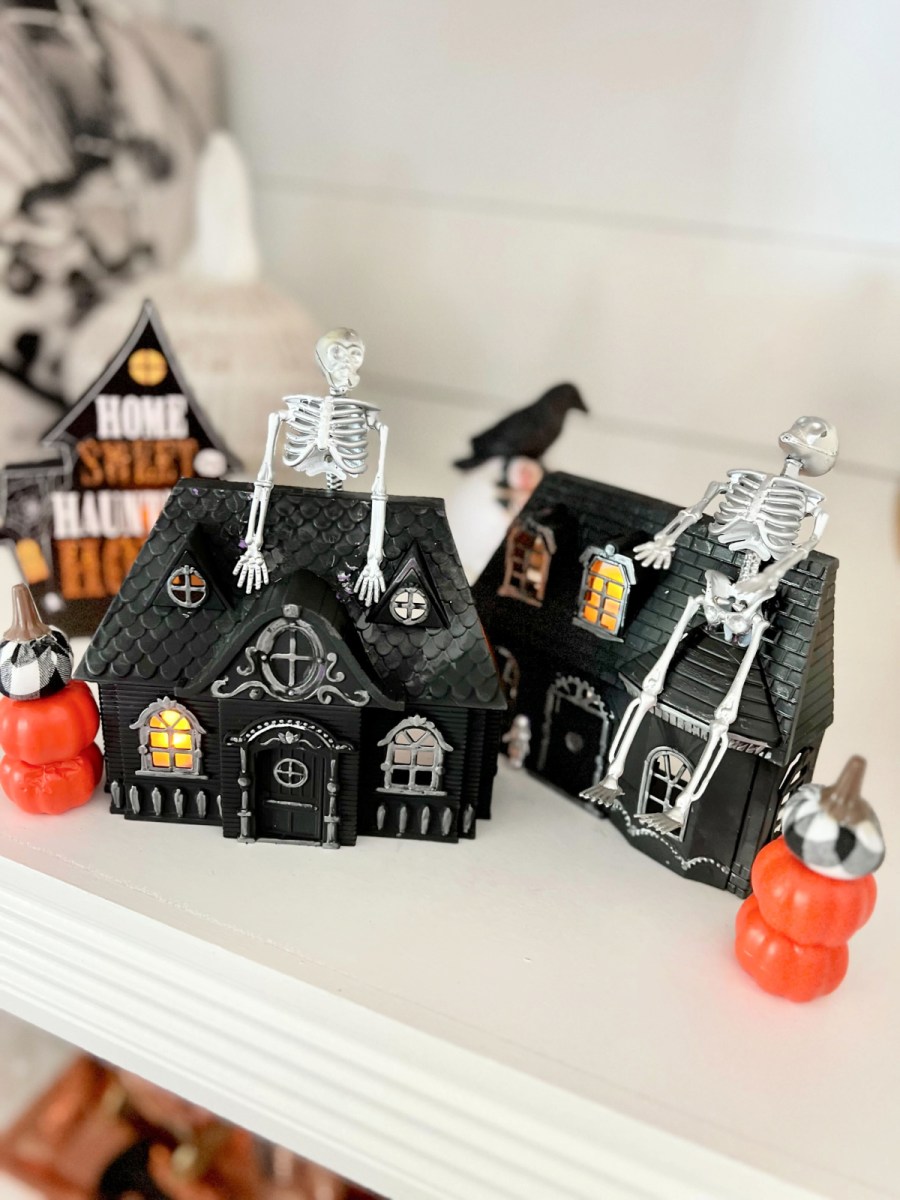
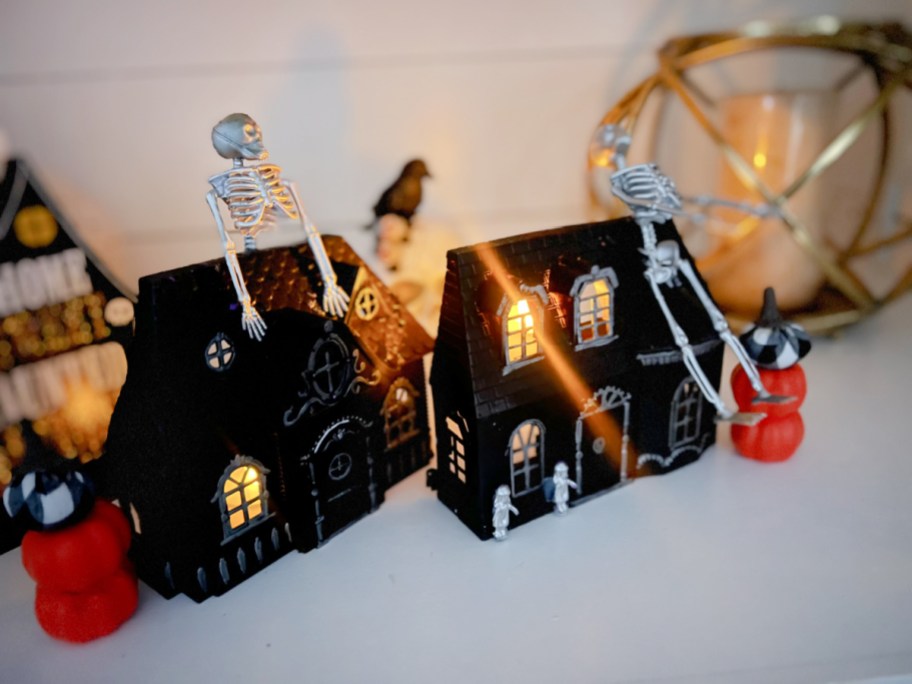
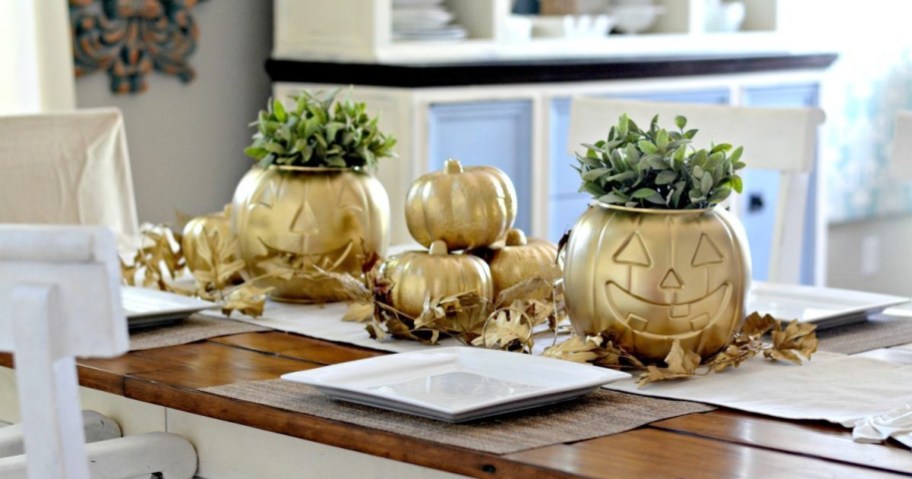
Arrange the painted pieces in the center of a table or on a mantle for chic fall decor that only costs a couple of dollars to make. That’s it!


spray painted pumpkins for diy halloween decor

A couple of tips when spray painting pumpkins from Dollar Tree:

  • I love looking for bargains at dollar stores and thrift stores, too, but you can save even more money by using inexpensive fall decor that you already own. This is such a fun and easy way to update and re-purpose any old decor you’ve grown tired of seeing year after year!
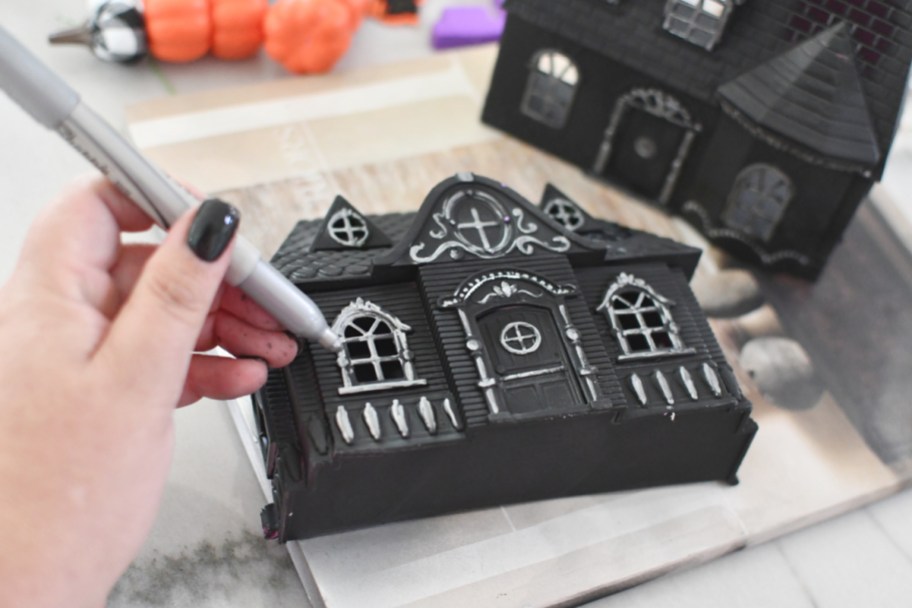
  • If you want to take decorating to the next level, Dollar Tree sells an assortment of jewels that you can add to the sides as some of our readers have mentioned!

Spray Painted Pumpkins

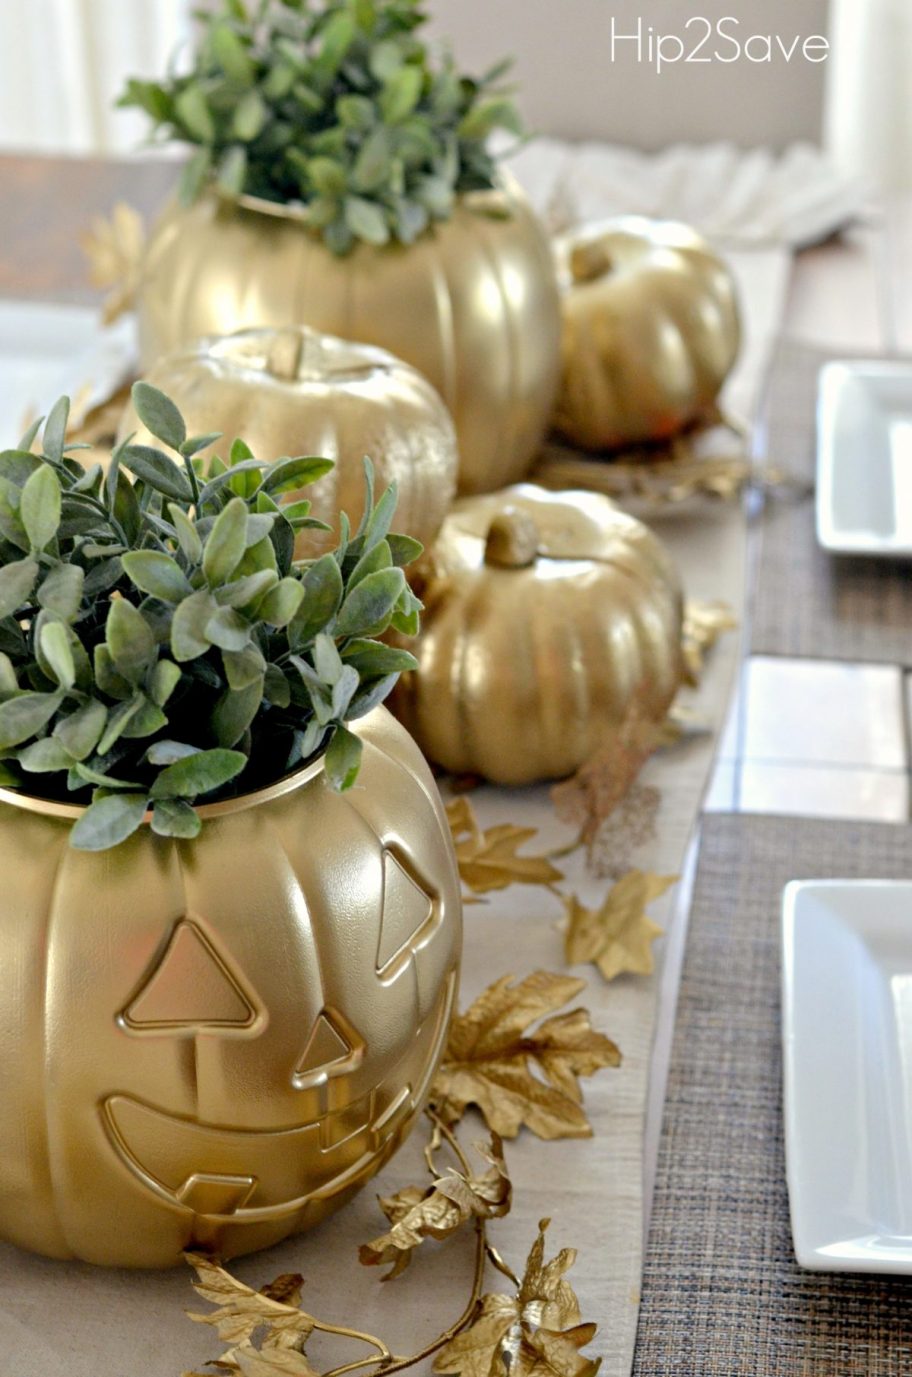
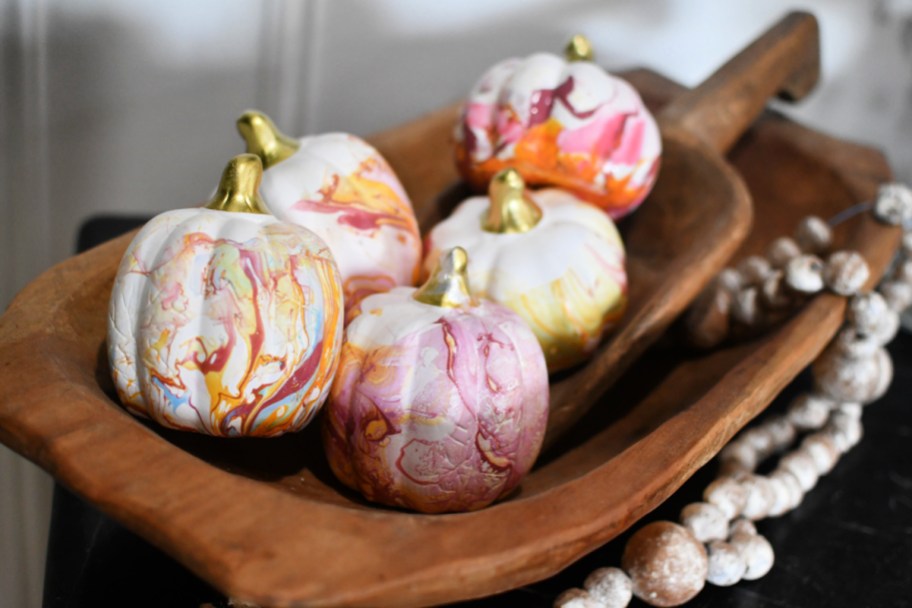
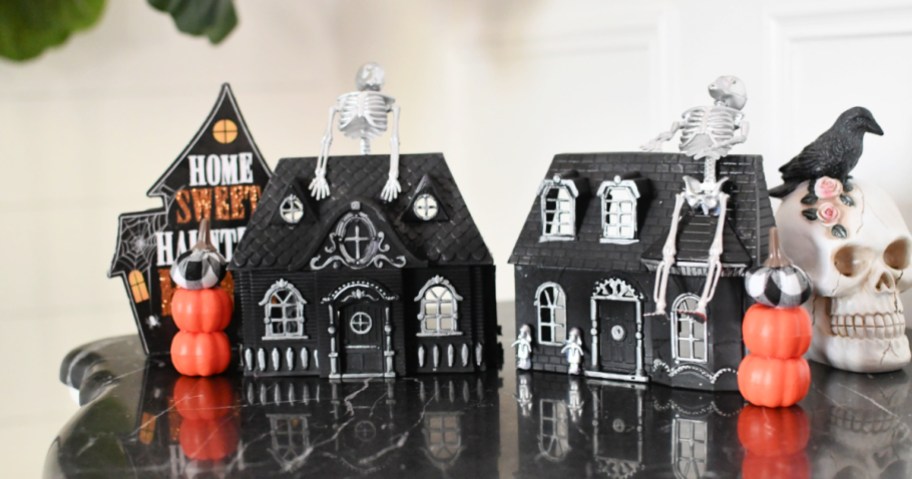
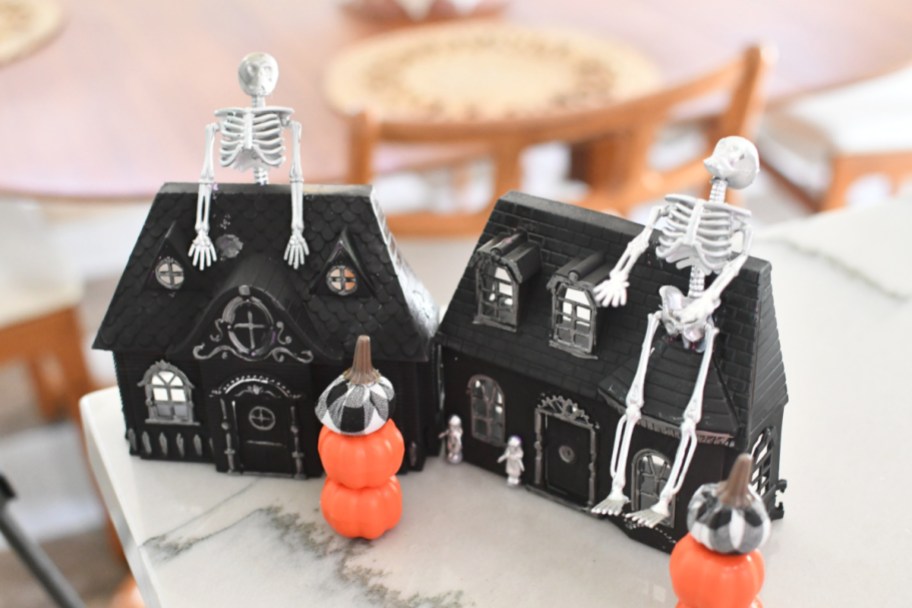
No one will believe these Halloween decor pieces are Dollar Tree plastic pumpkins!

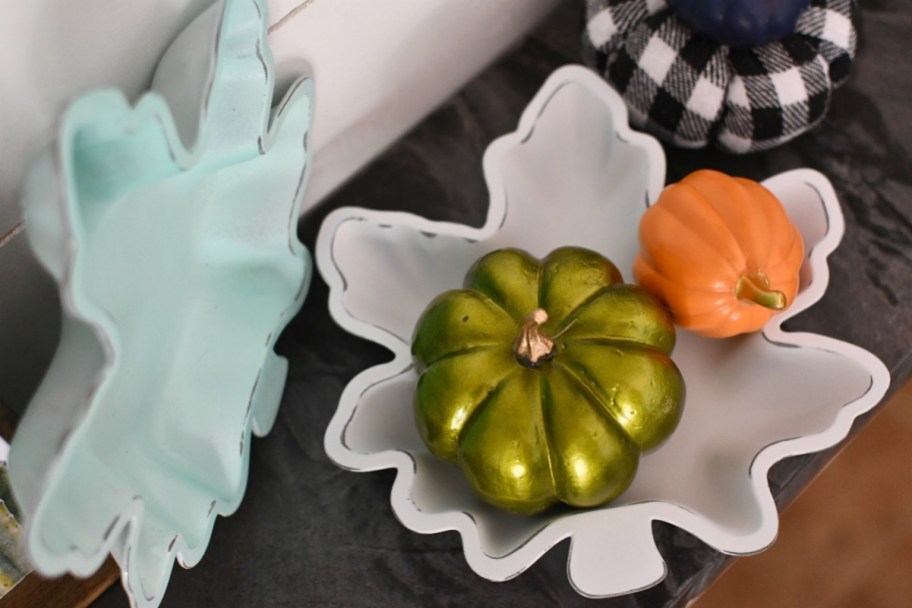
After the paint is dry, have fun arranging and stacking your pumpkins on a table. Fill the larger candy pails will plants or flowers if desired. The plants pictured above are just inexpensive greenery found at IKEA, and I use them every season!

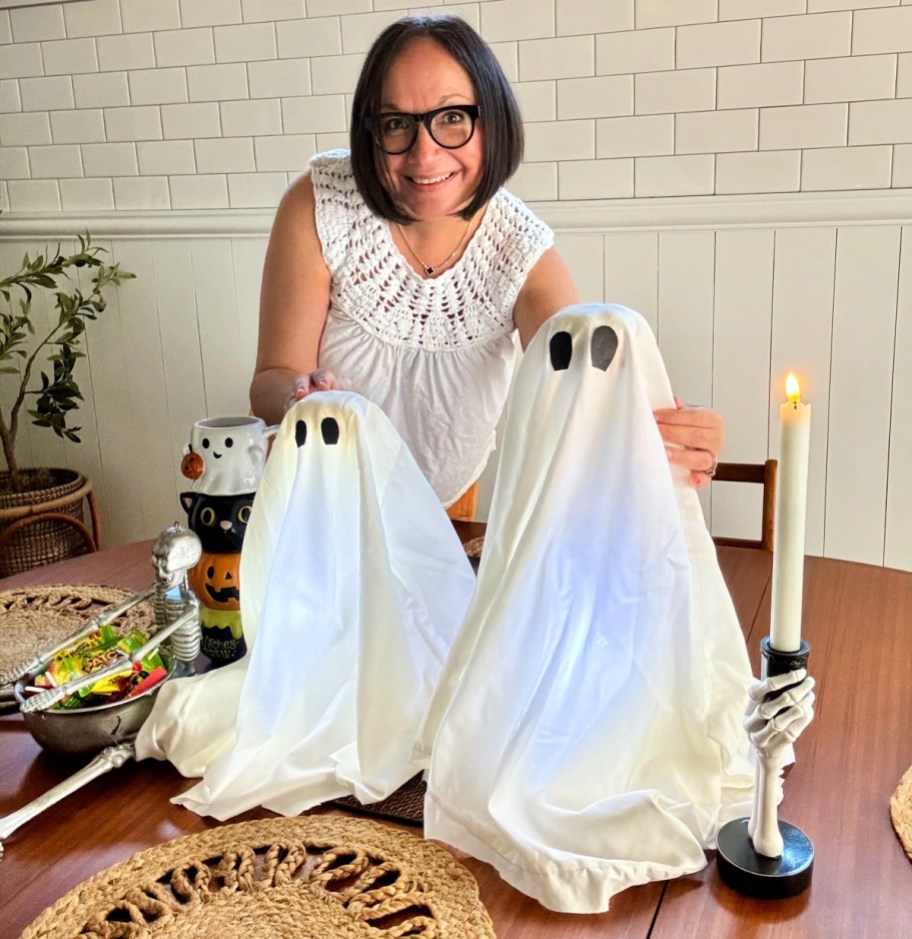
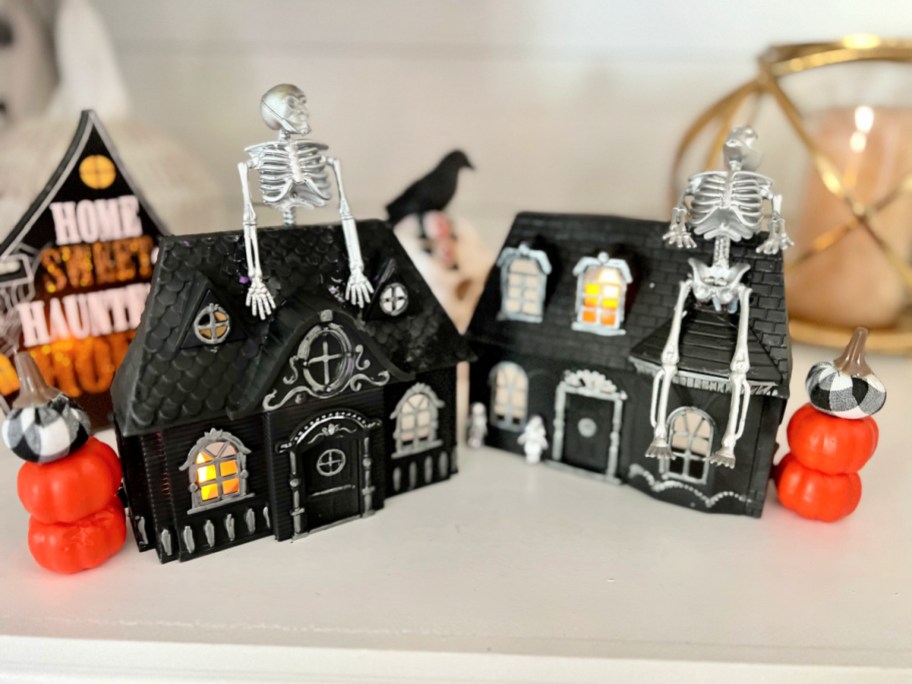
I’m really enjoying my festive table, and I love the fact that it didn’t cost a ton of money. I hope you enjoy spray painting pumpkins and the results of this fun DIY, too!


Make my DIY Bubbling Witches Cauldron next!

woman-holding-a-witch-broom-plunger-1.jpg

Turn a Plunger into DIY Witch Broom Halloween Decor!

I tried this popular Dollar Tree DIY witch broom craft and it’s beyond adorable and fun to make for Halloween!

woman holding a witch broom plunger

Want more easy ideas for DIY Dollar Tree Halloween decorations?

This unexpected hardware supply makes a cute DIY witch stand-up broom!  I never thought about using a plunger as a holiday decoration until I started seeing some cute ones pop up online over the last couple of years. This is a popular and inexpensive craft idea that is worth doing!

In fact, most or all of the supplies you can grab at Dollar Tree. My store did not have a plunger, so I grabbed one at Walmart. The rope I used is from Dollar Tree and it’s so fun to work with. When you unwind it, the curly cotton looks so cute and whimsical!

witch broom plunger craft on a table

The result is an adorable witch broom that you can style with other Halloween decor. Using a plunger as a stand is a clever and useful idea!

plunger with rope and hot glue gun on the counter

gluing rope to a plunger handle

unraveling rope on a broomstick

making a plunger witch broom with rope

covering hot glue with rope piece

painting a plunger handle black

holding a witch broom plunger


DIY Witch Broom Plunger


Print

Directions

1

Start gluing one end of the rope a couple of inches above the rubber portion of the plunger and let it hang down. Cut the length so the piece covers the rubber. Then repeat that process of gluing and cutting in a circle around the handle. Unravel each piece of rope.

2

Do this same process 2 more times about 2-3  inches apart up on the handle so there will be three tiers of rope in total. Unravel them all.

3

Cover the top of the “broom” where all the hot glue is exposed with an extra piece of rope to make it look neater. Also wrap the “broom” a few times with rope toward the top so it gathers like a broom shape. Tie it off.

4

Paint or stain the broom handle if desired. I used a bit of painter’s tape to make sure I didn’t get paint on the rope. 

5

Add a bow or any other embellishments if desired and display with other Halloween decor.


More tips for creating this DIY witch broom craft:

  • I recommend finding this Dollar Tree cotton rope in the floral craft section. It’s so easy to work with! Call ahead to your store beforehand to see if it’s stocked.
  • I tried this with a couple of other types of rope and they were too hard to work with. Raffia could be another material to consider, or maybe a raffia skirt.
  • I love the idea of adding a spider or any other cute Halloween embellishments.
  • While at Dollar Tree grab some toilet brushes to make these fun DIY ghosts too!

black and white dollar tree plunger witch broom craft

This does not even look like a plunger now!

My DIY witch broom makes such a festive addition to my other Halloween items, like my DIY cheesecloth ghosts and DIY skeleton candy bowl, and I love the whole look. If you’re also into making your own inexpensive Halloween items like me, try this unique idea!


Create these fun and easy pretzel witch broom snacks with the kids!

diy-dollar-tree-toilet-brush-ghosts-1.jpg

Turn Dollar Tree Toilet Brushes Into Spooky DIY Ghost Decorations

Grab a few cheap items from Dollar Tree and easily DIY these adorable ghosts this Halloween

diy dollar tree toilet brush ghosts

No need to spend a ton on Halloween decor!

Make these fun and creative DIY ghost decorations using toilet brushes from Dollar Tree! Yep, you read that correctly. Turns out these $1.25 brushes and the stand it comes on make a “boo-tiful” setup for tabletop Halloween ghosts. You can even grab an LED puck light at Dollar Tree and add it inside for a fun glowing effect!

The result is a super cute and spooky ghost display you can style on a table for Halloween! 🎃 👻 

woman placing DIY ghost decor on a table

Here’s how I created these DIY ghost decorations on the cheap.

I was inspired to come up with a less expensive version of these DIY ghost kits that are popular on Amazon this year! They come with a little stand and everything needed to set up ghosts similar to these. With prices at around $30-$40 for two, I opted to come up with a similar idea for just a few dollars each instead!

supplies for toilet ghosts craft

My version uses toilet brushes as a stand, foam pumpkins for the head, and a puck light underneath. Luckily I had a couple of old white pillowcases in my linen closet that I cut up to repurpose for this ghost craft. My total investment was less than $7 for these!

cutting the top of a toilet brush

gluing a pumpkin to top of brush

cutting up a pillowcase to make tabletop ghosts

cutting felt eyes for ghosts

adding a puck light to ghost


DIY Ghost Decorations From Toilet Brushes


Print

Supplies Needed

Directions

1

Tape the brush to the stand so it’s very stable and straight. Cut the end of the brush a few inches if a varied height is desired.

2

Remove the stem from the pumpkin and use hot glue to glue it to the top of the brush handle. (If you need to paint the pumpkin white do that step next.)

3

Place the sheet over the ghost and use scissors to cut it if needed. Cut eye shapes from felt and glue to the front using hot glue.

4

Add the light underneath the sheet. Display with Halloween decor and enjoy!


Additional tips for making ghost DIY Halloween Decorations:

  • Try to find white styrofoam pumpkins for the head or spray paint them white first so the bright colors won’t show up under the sheet.
  • In order to get a shorter and taller ghost I cut a few inches off the top of one brush. I used a serrated knife and then easily bent the piece in half to break it.
  • I used 2 king-sized pillowcases for my ghosts, and trimmed them to fit better using scissors. Maybe white tablecloths from Dollar Tree could be used instead as an alternative.
  • The LED lights do require batteries so check Dollar Tree for those as well.
  • If you have Christmas lights or fairy lights, you could always include those instead of a puck light.

diy ghost decor using dollar tree supplies (2)

I love these DIY ghost decorations and they are so quick and easy to make! 

Do you enjoy making Halloween decor for around the house this time of year? Try this idea and let us know how yours turn out! Maybe make it a craft night with friends to gather and create some together. Happy crafting!


Check out these fun and easy DIY skeleton Halloween bowls.

Masks-in-Jars.jpg

DIY Creepy Head in a Jar: All You Need is Water, a Mask, and a Jar!

Spook your guests with our DIY Head in a Jar project. You can create creepy Halloween decorations in just minutes!

Halloween Masks in Jars, a DIY Halloween Decor Project

Things are getting really creepy this Halloween! 🎃

Easily create frugal and creepy Halloween decorations with our DIY Head in a Jar idea using only water, masks, and a jar! Trick-or-treaters are going to love it…or fear it!

Halloween decorating can go beyond pumpkins and pretty fall wreaths. If you’re aiming for an extra dose of spookiness this year, this craft is perfect for adding a delightfully eerie touch to your home.


The results of these creepy Halloween decorations are unreal!

close up of halloween masks in glass jars on wood table

I’ve never been a huge Halloween fan, but my two boys enjoy scary things, so I’ve started to come around to the idea of adding some creepy Halloween decorations to our home.

Oh, the things we do for our kids. 😂

My Hip sidekick, Lina, made this craft years ago so last year I decided to make my own! My boys got such a kick out of it and it also makes for some great decor during trick-or-treating!

creep halloween decorations - face masks in walmart shopping cart

All you’ll need to make these creepy Halloween decorations is a creepy mask (the more realistic, the better!), a glass jar, and water!

You could even consider adding a glow stick and/or gluing fake eyeballs to the masks for an even creepier effect!

halloween masks in walmart shopping cart

The masks I used last Halloween are no longer available, but here are some I spotted online that would be perfect for this DIY Head in a Jar project!

Heading in the store? I found a larger selection at my local Walmart and many of the more affordable masks weren’t available online.

hand holding a thrift store fortnite mask

As another idea, head to your local thrift store for a possible score! While I didn’t have any luck with mine, you may be able to find a creepy mask for just a couple of bucks, which makes this easy DIY even easier on your wallet!

You can make this Halloween DIY even more frugal if you already have a mask lying around. 👏🏻

*Note that masks made of hard plastic are not ideal for this craft. 


Dollar tree Halloween masks in a bin

Hip Tip: Dollar Tree also has tons of Halloween masks to choose from if you’re on a really tight budget. I personally didn’t feel their masks last year were that great so I opted for the more realistic options at Walmart for mine despite being more expensive.


halloween clown mask in clear glass jar in walmart store aisle

I found gallon-sized jars work best to fit my Halloween face masks and since I didn’t have any laying around, I grabbed a few at Walmart.

Plus, these glass storage jars are super trendy right now, so even though they weren’t the most frugal idea, they can easily be repurposed. Consider using them as a pretty pantry storage idea or even for regifting as Lina did for this Christmas idea!

halloween face mask in pickle jar on kitchen counter

A gallon-sized pickle jar is a frugal option for this DIY, too.

If you have one lying around or plan to purchase a jar of pickles for your upcoming Halloween party, Lina originally shared these creepy Halloween decorations using an old jar she had!

That makes this DIY Head in a Jar potentially FREE is if you have a jar and a mask already! 👏🏻

This sealed or air-tight glass jar idea is best if you plan to place your creepy Halloween mask jars in places they could potentially be knocked over.

A DIY Head in a Jar being filled with water in the sink

Creepy Mask in a Jar Halloween Decoration

creepy halloween decorations - face masks in clear glass jars on wood table


Halloween Heads in a Jar


Print

Directions

1

Gather your creepy Halloween face masks and gallon-size jars. Again, the creepier and more flexible the mask, the better your outcome will be!

2

Take off any foam padding from inside and cut off black elastic straps. This step is optional, but encouraged so it doesn’t take away from the realistic look once complete!

3

Place your Halloween mask in your jar and fill it with water until full. You may have to reposition the mask as it fills.


Hip Tip: One of my masks had hair and it did just fine in the water. However, you can also opt to have some stick out of the lid as I did with the Granny & Zombie masks. This also helps hide the mask’s back and make it look more realistic. 

4

Place your lid on once your jar is full and your mask is positioned the way you want it.

5

Now you get to enjoy your creepy Halloween decorations!


creepy halloween masks laying out to dry on blue towel

Save your creepy Head in a Jar decorations for next year!

Once Halloween is over, empty your jars and lay your masks out to dry so you can save them for next year’s creepy Halloween decorations! 👏🏻

hand holding side of glass jar with creepy halloween decorations inside

Well, I’m not sure what our neighbors will think, but the boys are getting a kick out of these simple and creepy DIY Halloween decorations! LOL! 🤣

Happy Halloween, Hip2Savers! 🎃👻

Oh, and don’t forget, if you make this fun & creepy DIY, share your Halloween decor with us by tagging us on Facebook or Instagram! We love seeing all your holiday creations and we love hearing from you even more!


WOW! Lina did this Halloween craft with a laundry pod container! 😱🤯😍

diy-marbled-pumpkins-drying-1.jpg

Create Marbled Pumpkins with Nail Polish—Easy DIY!

Grab colorful nail polish and pumpkins to create these easy and beautiful marbled pumpkins!

diy marbled pumpkins drying

Want a fun and frugal way to paint pumpkins this year? 🎃

Check out these beautiful DIY nail polish-dipped pumpkins I just painted. I am not even kidding when I tell you this may be my favorite fall craft EVER. The result is stunning and the options are endless on desired colors.

These marbled pumpkins have an Anthropologie vibe once dried and styled in a bowl as decor! To make these, add a few drops of each nail polish color to a bowl of water, swirl it around, and dip the pumpkin. So easy!

painted pumpkins

Can you even believe these beautiful white ceramic pumpkins with gold stems are from Dollar Tree?! The nail polish is too. This makes a brilliant low-budget EASY craft that’s perfect for fall!

Feel free to use real pumpkins or faux plastic pumpkins instead. I tried with styrofoam pumpkins and it did not work.

bowl of water with supplies to make nail polish marbled pumpkins

adding blue nail polish to water

swirling nail polish on top of water

dipping a faux pumpkin in marbled nail polish

setting-painted-pumpkin-on-a-drying-rack

holding a diy marbled painted white pumpkin


DIY Nail Polish Marbled Pumpkins


Print

Directions

1

Fill a bowl or container with water. Just make sure it’s deep enough to dip the pumpkin.

2

Add 5-10 drops of nail polish of various colors to the water. You’ll see how it will float to the top. Use a wood skewer to swirl the colors around.

3

Dip the pumpkin in the water and when you pull it out the nail polish sticks to it! Let the pumpkin dry. Refresh the water for each pumpkin,


Tips for making nail polish-dipped marbled pumpkins:

  • Use a bowl that may not mind tossing as the nail polish does seem to stain.
  • Replace the water between each pumpkin for best results.
  • I tried using shaving cream instead of water and it didn’t work. I thought it would be similar to this Easter egg craft, but didn’t quite work.
  • If your pumpkins don’t have a gold stem it would be easy to apply gold paint to them as a last step! You could instead grab this 12-piece set of plastic white pumpkins from Amazon.com.

diy marbled pumpkins in a wood bowl

I’m sorry but these dipped pumpkins are insanely cute!

I feel like the whole process is so magical and fun. Grab a group of friends and have a special fall craft night to make some for yourself. It’s a great way to embellish pumpkins for fall!


Consider making some pretty Mod Podge and tissue paper pumpkins too.

woman-holding-a-diy-halloween-candy-skeleton-bowl-1.jpg

DIY Halloween Skeleton Candy Bowl (Cheap Pottery Barn Lookalike Craft!)

Create this spooky skeleton candy bowl as an easy craft project using an inexpensive plastic skeleton and bowl! 

woman holding a diy halloween candy skeleton bowl

No bones about it, Halloween crafts are so much fun!

This easy lookalike Pottery Barn skeleton bowl idea is the perfect DIY to prepare us for trick-or-treaters. You’ll be able to use this spooky bowl to hand out candy on the big day or display Halloween decor at your party. I love that it’s a fairly easy glue and spray-paint project that anyone can do.

pottery barn skeleton bowl

Let’s get this silver and black Pottery Barn look for less.

Mine looks somewhat similar to the $200 bowl, but I spent less than $20 on it!  Plus, I made a little Dollar Tree version using a small plastic skeleton and bowl from Dollar Tree. You can make this idea work for any budget. I picked up the 35-inch skeleton from Michaels and used a $2 plastic 6-quart mixing bowl from Walmart.

skeleton bowls by the front door with halloween candy

To get this look glue a plastic skeleton holding a bowl, spray paint it silver, and then use a rag to apply some black stain or paint to make it look like a darker metal similar to the Pottery Barn version.

skeleton bowl craft supplies on the counter

gluing a skeleton to a bowl

spray painted bowl with glued skeleton

spray painted skeleton bowl

rubbing stain onto plastic skeleton

staining skeleton bowl with black stain

empty skeleton bowls on the table

large and small diy skeleton bowl


DIY Halloween Skeleton Candy Bowl


Print

Directions

1

Use glue to attach the bowl to the skeleton. Glue the hands to the front of bowl as if the skeleton is holding it. Let dry.

2

Spray paint the bowl and skeleton silver. This will take a couple of coats. Let dry.

3

Use a rag with stain or watered-down black paint and wipe the skeleton and bowl to add dimension and texture. The goal is not to paint it black but rather to add darker black color in the details of the bowl.

4

Optional step of spraying with clear spray paint to protect the project. Let dry and add candy of Halloween decor to your bowl for Halloween!


Extra tips for creating a lookalike Pottery Barn candy bowl:

  • Before buying any supplies check to see if you already have similar hanging skeletons in your Halloween stash! You can experiment with different-sized bowls and variations. This could be a thrift store makeover opportunity as well.
  • If you opt for adhesive like I used, it does take a bit of time to hold the skeleton on the bowl for it to dry. Maybe opt for hot glue first as it’s probably easier and quicker!
  • I had a can of clear topcoat spray paint on hand and used it as a last step to protect the paint from peeling and scratching. This is optional but the project will likely last longer.

diy skeleton bowl craft project halloween

How fun are these adorable candy bowls?! 

This is so great for a Halloween party or to display wrapped candy for trick-or-treaters. It does look more expensive than it is too.

What do you think? Would you like to make one too?  Let us know in the comments if you have made this project or anything similar! Happy crafting.


Check out this Pottery Barn-inspired DIY skeleton cutting board from last year! 

diy-dollar-tree-leaf-dish-makeover-.jpg

Turn a $1 Dollar Tree Leaf Dish into Cute Fall Decor with Spray Paint!

This simple Dollar Tree fall decor DIY uses plastic maple leaf dishes and spray paint for an adorable autumn tray.

diy dollar tree leaf dish makeover

Ready to get going on your fall home decor?!

I’m sharing how I made these $1 plastic Dollar Tree maple leaf dishes into pretty fall decor pieces using just spray paint! This Dollar Tree fall DIY is a super easy craft anyone can do, and the price is right for this inexpensive project.

The result is a beautiful, rustic farmhouse-style piece that looks much more expensive than $1. Plus, you can style and display it on a shelf or mantel as part of a fall vignette.

Does Dollar Tree sell spray paint?

You won’t find spray paint for sale at Dollar Tree, but to keep your DIY frugal, you can spray paint for an affordable price at these store recommendations:

Hip Tip: If you have an unsteady hand, try using a Rust-Oleum Spray Grip. It makes it even easier to spray paint, and is less than $5!

Tips for making these Dollar Tree maple leaf dishes:

  • Try these awesome spray paints I used! I used this Rust-oleum Chalked in linen white for the first time and love the matte texture. It’s so beautiful, and it sprayed on this Dollar Tree fall decor very even and smooth. The blue leaf is Rust-Oleum in ocean mist color. I love that minty blue!
  • Apply several light coats of spray paint. I know it’s super tempting to keep spraying, but if you can do a few light coats and let them dry in between, it’ll look great!
  • Sand the edges for a rustic farmhouse look! I used a light grit sanding block and paper to add character around the edges.

Dollar Tree plates next to a can of chalk paint

spray painting a plastic leaf blue

sanding the edges of painted dollar tree dish

spray paint and leaf dishes on counter


Dollar Tree Leaf Dish Makeover


Print

Directions

1

Spray paint the back and front of your Dollar Tree leaf dish. Do several light coats as needed. Let dry.

2

Once dry, gently sand the edges around the leaf to reveal a little of the underneath color. Note this is optional for a more rustic look.

3

Display on shelf or mantel and style with pumpkins and other fall decor.


diy leaf bowl on the mantel

I’m FALL-ing for this Dollar Tree fall decor leaf craft for sure!

Aren’t these maple leaves so cute? This Dollar Tree fall DIY continues to please year after year! These leaves look like they came from a more expensive home decor boutique, rather than the dollar store!

painted fall leaves from dollar tree styled on mantel

I just love using spray paint for an instant makeover, especially on Dollar Tree items. It’s so easy to incorporate your Dollar Tree maple leaves into your own fall decor by styling them with small pumpkins like I did above – so cute!

Check out more of our frugal crafts and DIYs!

holding-detergent-for-laundry-stripping-.jpg

How to Strip Laundry + Try Our Laundry Stripping Recipe (It’s Better Than Bleach!)

Learn how to strip laundry! Our easy 3-ingredient laundry stripping recipe is more powerful than bleach!

holding detergent for laundry stripping

Ever heard of laundry stripping?

I really hadn’t either until I started seeing murky water videos and pics trending on TikTok and Instagram back in 2020.

People were soaking their towels in bathtubs filled with hot water and a laundry stripping recipe, and then showing how the water would turn dark. It’s sort of gross yet satisfying at the same time!  😂

laundry stripping

The more I researched how to strip laundry and detox clothes, I actually started to see lots of savvy cleaning sites have content surrounding the concept. So it isn’t a new topic, but I had never tried it myself and wanted to give a laundry stripping recipe a shot!

Honestly, laundry is NOT one of my favorite chores. In fact, it may just be my least favorite household activity, but seeing intriguing videos of laundry stripping suddenly perked my interest and motivated me to try it!

Are you a visual learner? I was so excited to give this a try that I even created a video showing how to strip laundry:


laundry stripping towels

What is laundry stripping? 

Learning how to strip laundry? It’s all about getting the stink and funk out of fabric! The idea is to soak and detox clothes, workout gear, sheets, and/or towels in water for a long time using a powerful mix of Borax, washing soda, and powdered laundry detergent. Bacteria, body oils, dirt, and fabric softener build-up, get released along with the hard-to-remove stinky smells.

It’s crazy how even CLEAN white sheets and towels can have such a build-up and create dark water when soaked! 

Below is a photo of my clean towels after 5 hours of soaking! Eww! 🙈

murkey water from stripping towels

Here’s how to strip laundry and detox clothes, towels, and linens…

The process involves filling a bathtub or a top-loading washer with hot water and then adding in the Borax, washing soda, and powdered detergent mixture. Then you can add in your sheets, towels, or workout clothing and let everything soak for 4-6 hours. Lastly, wash and dry like normal.

According to DailyMail.com, this 3 ingredient laundry stripping recipe is more powerful than using bleach!

3 ingredient laundry stripping method

For this laundry stripping recipe, you’ll need 1/4 cup Borax + 1/4 cup washing soda + 1/2 cup powdered detergent:

  • Borax is a popular laundry booster for lifting acidic stains, making fabrics whiter, and dissolves great for this soaking technique.
  • Washing soda or sodium carbonate is also great for soaking hard-to-remove stains due to its high alkalinity and helps to remove hard water build-up in the laundry. In case you have a hard time finding it, I found my Arm & Hammer washing soda at Walmart, and it seems readily available there.
  • It’s recommended to pick a powdered laundry detergent as it will dissolve easier than a concentrated liquid one. I am using powdered Tide, and if you need an allergy-friendly option then consider Tide Free & Gentle (or your favorite brand) instead.

Hip Tip: Mixing hot water and a small amount of powdered laundry detergent is actually another popular hack for cleaning up carpet and upholstery stains. As always, you’ll want to test a small area first. 

woman holding white towels

filling a bathtub with water

stripping towels in the bathtub

mixing laundry with end of broom

putting towels in the washer


Laundry Stripping Recipe


Print

Directions

1

Place towels or clothing in a bathtub or top-loader washer and cover with HOT water.

2

Mix Borax, washing soda, and powdered detergent together. Sprinkle the mixture over the contents in the water.

3

Mix the apparel, bedding, and/or towels around in the laundry stripping solution and let soak for 4-6 hours, making sure to mix once every hour for as long as they soak. I actually used the end of a broomstick because my water was too hot to touch!

4

Drain the water and transfer the contents to the washer. Wash and dry laundry like normal, except now you don’t have to add more detergent.

5

Enjoy your soft and clean laundry!


laundry stripping in the tub

Here are a few tips to consider when laundry stripping:

  • This is a pretty powerful deep-cleaning method that shouldn’t be used on delicates or anything needed to be washed gently. Reserve this laundry stripping recipe for ultra-stinky gym clothes, sports shirts, towels, and sheets. Also, if you do this on colored items, keep like colors together to avoid bleeding. That said, depending on your tub, this solution could stain the surface. This treat is better reserved for whites and light colors.
  • Reserve this method of stripping laundry every few months so it won’t damage your fabrics. This isn’t meant as an everyday laundry routine. Also keep in mind that I have affordable white towels from Costco, so if you have some expensive fancy ones, proceed at your own risk.
  • I did use this method to detox clothes and strip my husband’s often stinky white undershirts with success. They aren’t perfectly white, but do smell and feel clean now!
  • You don’t have to use a bathtub! I used mine because I don’t have a top-loading washing machine. You could also use a large bucket or put this laundry stripping recipe in a sink using the same ratio but smaller amounts of the recommended cleaning powders.

clean towels on the dryer

Now I’m searching for more things to wash with this laundry method!

This laundry stripping recipe is going to be helpful as I’d like to tackle some of my son’s funky-smelling football and baseball clothes next. My sister-in-law recently told me she used this same method in the sink to soak some of her husband’s hats that had a funky smell, which I think sounds smart, too!

sports apparel for laundry stripping

Share with us in the comments if you’ve tried this laundry stripping recipe! 


Here’s another way to wash sheets without bleach.

filing-system-for-kids-paperwork-e1706714017852.jpg

DIY School Paper Memory Keeper for Your Kiddo: Grab Your Free Printable Labels!

Wondering how to organize kids’ school papers at home? This DIY school paper organizer is easy & efficient!

filing system for school paper organization

Looking for a better way to organize your child’s school papers & memories this year? 📚🤓

Storing keepsake papers, awards, report cards, artwork, etc., can become so overwhelming for a parent. While you’d like to keep everything realistically, that isn’t always possible.

Unless you make a school paper organizer! This way, you can hold everything in one place and stay organized! Plus, it keeps your kiddo’s schoolwork from getting crinkled or destroyed.

Consider setting up a system before the school year starts so you can easily organize your memories all year long!

school paper organizer for kids' papers

How to organize kids’ school papers at home.

I want to say that I’m an organized person, but honestly, I’ve always struggled with paper clutter and knowing what to do with my children’s “stuff.” For instance, I have papers stashed in my office, the kitchen, their rooms, and even the garage.

With that said, I’m working on this school paper organizer project to get myself motivated to identify the BEST pieces to hold onto, and so far, it’s working!

finished school paper organizer storage bin

This easy filing system keeps only the very best memories of each school year and stores them all together in a plastic hanging file bin for each child. This paper storage solution has been such a helpful idea for me, and it’s working out great for our family!

I’m sharing these FREE printable labels and cover sheets so you can create a school paper organizer for your kids, too!

printables for school paper organizer

supplies needed to create school paper organizer

School organization storage file box


DIY School Paper Organizer


Print

Directions

1

Fill out the hanging file cover sheets for each grade including year, teacher, school, etc., and attach a school photo for each year. Glue or tape to the front of a hanging file.

2

Attach labels for each school year to file folders. If desired, you can create multiple file folders for each year and separate them into different categories such as schoolwork, artwork, awards, etc. File papers according to each grade level.

3

Label the bin with your child’s name. Feel free to use a marker, or save this blank label with a school supply border and open it in an image editor to add text. I used PicMonkey.com, an online editing tool, to add text to images. The font pictured is called Yesteryear.


woman pulling a paper from a school paper organizer bin

This school paper organizer is really easy to keep up with once you have it all set up!

If you’re wondering how to organize kids’ school papers at home, try this easy DIY project. Honestly, I wish I had done this storage system years ago when my first child started school. I love looking back at all my kids’ special writing assignments and memories, and I know that they will, too, in the future!


Stock up on school supplies with our best deals!

DIY-Dollar-Tree-Halloween-Decor-.jpeg

Must-See: Halloween Doll House Makeover Using Dollar Tree Finds!

Turn a Dollar Tree doll house into spooky Halloween decor using spray paint and inexpensive craft supplies. 

DIY Dollar Tree Halloween Decor

If there is a craft trend that includes spray paint and Dollar Tree items I am all in! Last year, I noticed how many people were painting doll houses to look BOO-tiful for Halloween and I had to try it. Stick an LED light behind your mansion and it turns into a terrific display piece.

Make a few and you’ll have an inexpensive Halloween village!

two painted doll houses Halloween dollar tree craft

Honestly, this little craft was even more fun and satisfying than I thought it was gonna be! I highly recommend painting your own Halloween mansions this year as it’s such a great activity and something you can create on your own or in a large group.

doll houses from dollar tree

Host a Dollar Tree doll house decorating party!

It would be a blast to host a party and have everyone decorate a house, similar to gingerbread decorating at Christmastime. It would be so fun to see how different they all turn out, as there are no rules with this craft! Let your creativity flow.

I decided to spray-paint my house black and some plastic skeletons silver. Making stacks of mini pumpkins is easy to do using hot glue. Dollar Tree has a good selection of stickers and embellishments for this idea.

dollar tree doll houses

spray painted doll houses using spray paint

using a silver sharpie on a haunted mansion dollar tree doll house craft

using a silver sharpie to decorate dollar tree diy halloween decor

gluing a skeleton to a painted Halloween

finished black halloween painted doll houses

holding dollar tree led candles

dollar tree houses in the dark with lights


Halloween Decor Doll House Makeover


Print

Directions

1

Spray paint the doll house black or other desired color. Let it completely dry.

2

Embellish areas like windows and trim using a silver sharpie, or paint pen. Add any other decorations as desired.

3

Style your house or houses with other Halloween decor. Add a tea light or two in the back of the house to light up.


Extra tips for this Halloween doll house makeover:

  • I recommend starting with a base layer of spray paint on these. They don’t seem to take acrylic paint with a brush very well. I attempted that first.
  • A silver Sharpie seemed to work well over the paint! You can consider using other craft materials such as a paint pen, glitter, puffy paint, etc.
  • Adding little LED tea lights adds such a nice effect at night. Fairy lights could work too.
  • This concept is not limited to a Halloween idea. Consider painting them brown and white like gingerbread houses for Christmas. So cute!

halloween decor from dollar tree houses

I am in love with my little Dollar Tree doll houses turned Halloween decor.

No one would ever guess this was pink plastic before! This is inspiring me to dream a little bigger and maybe do a larger makeover on a thrift store doll house. That would make such a creative Halloween display on a larger scale.


Check out my festive jack-o-lantern decorated front door using Dollar Tree items!